
Plastic Bottle Sweet Peppers: Unlock the secret to bountiful harvests with this ingenious DIY trick! Have you ever dreamed of growing plump, juicy sweet peppers right in your own backyard, but felt limited by space or a short growing season? Well, dream no more! This simple yet effective method, utilizing repurposed plastic bottles, is about to revolutionize your home gardening experience.
For centuries, gardeners have sought innovative ways to extend growing seasons and protect their precious crops. From ancient Roman greenhouses to modern-day hydroponics, the quest for the perfect growing environment has always been a driving force. While we might not be building elaborate structures, this plastic bottle technique taps into that same spirit of ingenuity and resourcefulness. It’s a nod to the past, embracing sustainable practices for a greener future.
Why do you need this DIY trick? Because growing plastic bottle sweet peppers offers a multitude of benefits! It’s a fantastic way to recycle, reducing plastic waste while simultaneously creating a mini-greenhouse effect that warms the soil and protects your peppers from harsh weather. Plus, it’s incredibly budget-friendly and requires minimal effort. I’m excited to share this easy-to-follow guide that will empower you to cultivate thriving sweet peppers, regardless of your gardening experience. Get ready to transform those empty plastic bottles into miniature pepper paradises!
DIY Self-Watering Sweet Pepper Planters from Plastic Bottles
Hey there, fellow gardening enthusiasts! I’m so excited to share this super easy and effective DIY project with you: creating self-watering planters for your sweet peppers using recycled plastic bottles. Not only is this a fantastic way to give those plastic bottles a new life, but it also simplifies watering, especially if you’re prone to forgetting or traveling. Plus, it’s incredibly budget-friendly! Let’s get started!
Materials You’ll Need:
* Plastic bottles (2-liter soda bottles or similar work great)
* Sweet pepper seedlings (already started or ready to transplant)
* Potting mix (a well-draining mix is crucial)
* Cotton rope or strips of fabric (for wicking water)
* Scissors or a utility knife
* Drill or nail (for drainage holes)
* Water
* Optional: Spray paint (for decorating the bottles)
Step-by-Step Instructions:
1. Prepare the Bottles:
* First, give your plastic bottles a good rinse with soap and water to remove any residue. Let them dry completely.
* If you want to get creative, now’s the time to spray paint the bottles. This is purely for aesthetics, so feel free to skip it if you prefer the clear look. I personally love using bright colors to add a pop to my garden! Make sure to use paint that’s suitable for plastic and allow it to dry completely before moving on.
2. Cut the Bottles:
* Using your scissors or utility knife, carefully cut each bottle into two pieces. You’ll want to cut them about one-third of the way down from the top. The top portion (with the bottle cap) will be inverted and placed inside the bottom portion, creating the self-watering reservoir.
* Safety First! Be extra careful when using a utility knife. A sharp blade is safer than a dull one, as you won’t need to apply as much pressure. Always cut away from yourself.
3. Prepare the Wicking System:
* This is where the cotton rope or fabric strips come in. These will act as wicks, drawing water from the reservoir up into the soil.
* Cut two or three lengths of rope or fabric, each long enough to reach from the bottom of the inverted bottle top down into the bottom of the reservoir, with a little extra length to spare. I usually aim for about 6-8 inches per wick.
* Thread the rope or fabric strips through the bottle cap. You can either drill a small hole in the cap (just big enough for the wicks to pass through) or, if you prefer, leave the cap off entirely. Leaving the cap off will allow for faster wicking, but it might also lead to slightly faster evaporation of the water in the reservoir. I’ve tried both methods and found that drilling a hole works best for me, as it helps to regulate the water flow.
4. Create Drainage Holes:
* This step is crucial to prevent your sweet pepper seedlings from becoming waterlogged.
* Using your drill or nail, carefully create several small drainage holes in the bottom of the inverted bottle top. I usually make about 4-5 holes, spaced evenly around the bottom.
* If you’re using a nail, heat it up slightly with a lighter or stove burner (be careful!) to make it easier to pierce the plastic.
5. Assemble the Planter:
* Now it’s time to put everything together!
* Insert the wicks through the hole in the bottle cap (if you drilled one) and let them dangle down.
* Invert the top portion of the bottle and place it inside the bottom portion. The wicks should be touching the bottom of the reservoir.
6. Add Potting Mix:
* Fill the inverted bottle top with your well-draining potting mix. Leave about an inch or two of space at the top.
* Gently pat down the soil to remove any air pockets.
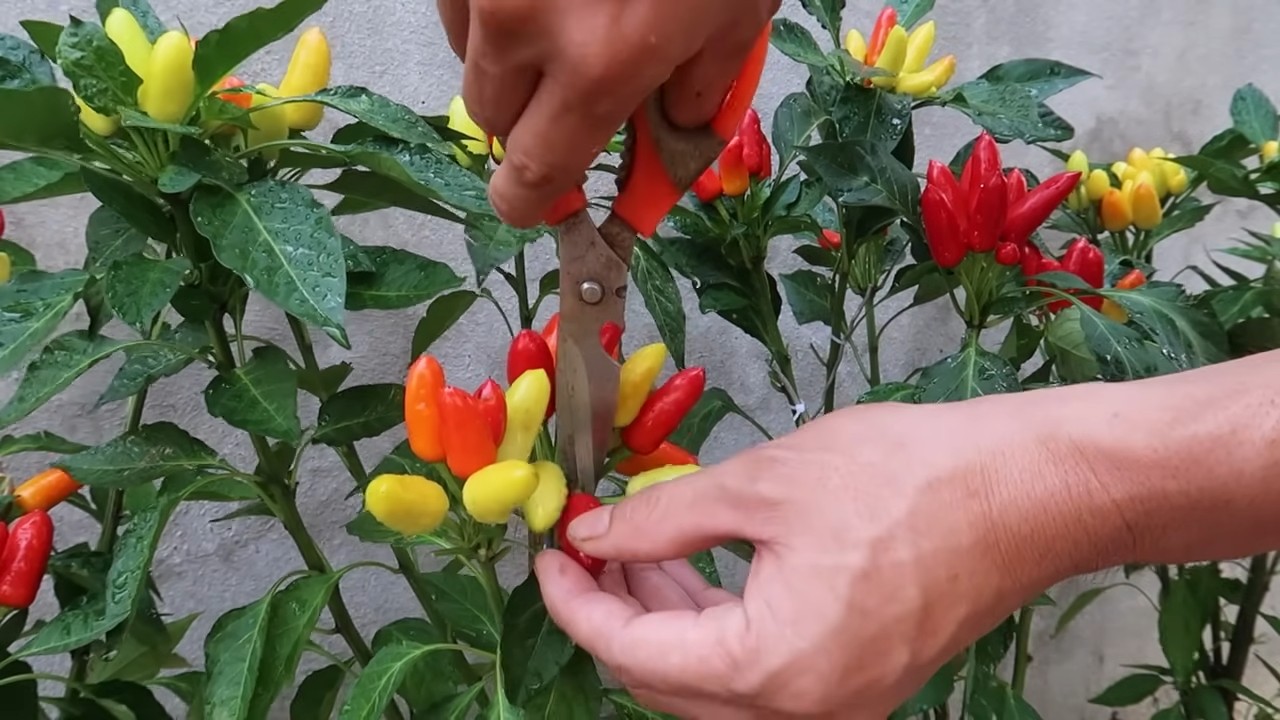
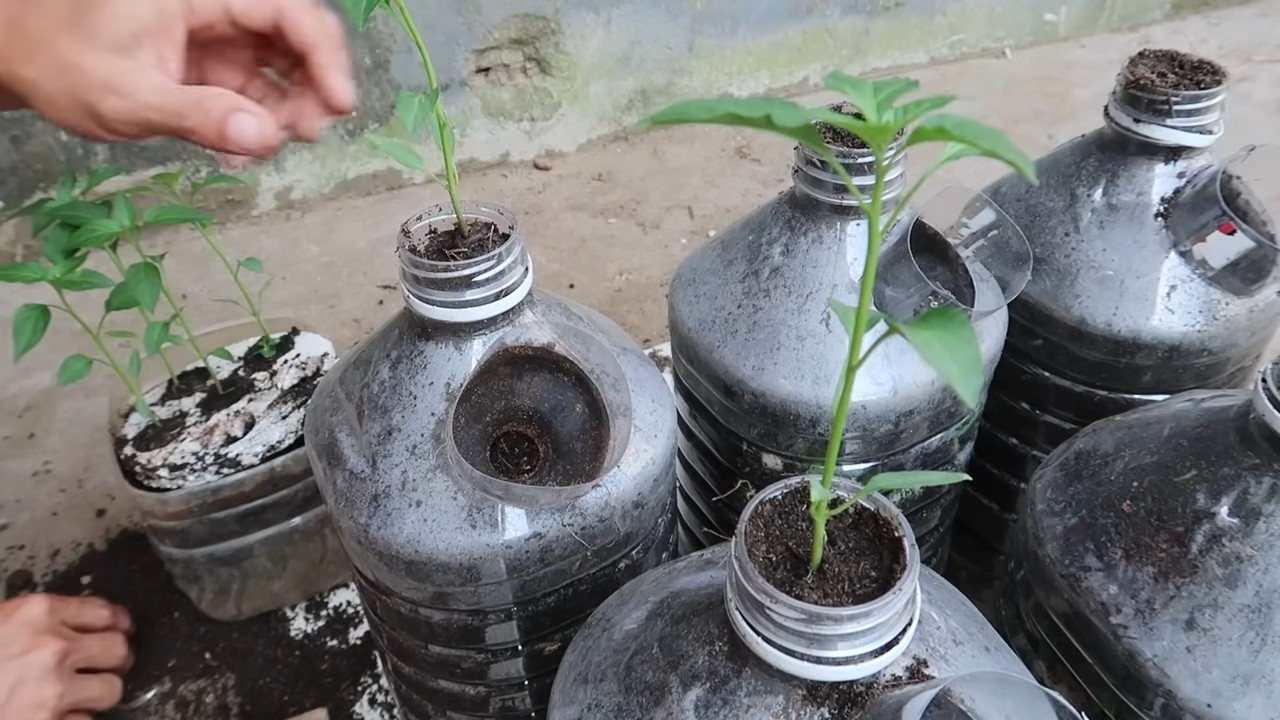
7. Plant Your Sweet Pepper Seedlings:
* Carefully remove your sweet pepper seedlings from their original containers.
* Create a small hole in the center of the potting mix in your DIY planter.
* Gently place the seedling into the hole and backfill with potting mix.
* Water the seedling thoroughly to help it settle in.
8. Fill the Reservoir:
* Pour water into the bottom portion of the bottle (the reservoir) until it’s about halfway full.
* The wicks will start drawing water up into the soil, keeping it consistently moist.
9. Monitor and Maintain:
* Keep an eye on the water level in the reservoir and refill it as needed. The frequency will depend on the weather, the size of your plant, and the type of potting mix you’re using.
* Check the soil moisture regularly to ensure that it’s not too wet or too dry. You can do this by simply sticking your finger into the soil.
* As your sweet pepper plants grow, you may need to provide them with support, such as stakes or cages.
* Fertilize your plants regularly with a balanced fertilizer, following the instructions on the fertilizer packaging.
Troubleshooting Tips:
* Soil Too Wet: If the soil is consistently too wet, it could be due to a few factors: too many wicks, wicks that are too thick, or a potting mix that doesn’t drain well enough. Try removing a wick, using thinner wicks, or amending your potting mix with perlite or vermiculite to improve drainage.
* Soil Too Dry: If the soil is consistently too dry, it could be due to not enough wicks, wicks that are too short, or a reservoir that’s not being refilled often enough. Try adding more wicks, using longer wicks, or refilling the reservoir more frequently.
* Algae Growth: Algae can sometimes grow in the reservoir, especially if the bottle is clear and exposed to sunlight. This isn’t usually harmful to your plants, but it can be unsightly. To prevent algae growth, you can paint the outside of the bottle or use an opaque bottle. You can also add a small amount of hydrogen peroxide to the water in the reservoir to kill any algae that may be present.
* Root Rot: Root rot is a serious problem that can kill your sweet pepper plants. It’s usually caused by overwatering or poor drainage. If you suspect root rot, carefully remove the plant from the planter and inspect the roots. If the roots are brown and mushy, they’re likely affected by root rot. You can try to save the plant by trimming away the affected roots and repotting it in fresh potting mix. However, in severe cases, the plant may not be salvageable.
Optimizing for Sweet Pepper Growth:
* Sunlight: Sweet peppers need at least 6-8 hours of sunlight per day to thrive. Place your DIY planters in a sunny location where they’ll receive plenty of direct sunlight.
* Temperature: Sweet peppers prefer warm temperatures, between 70°F and 85°F. Protect your plants from frost and cold temperatures.
* Watering: While the self-watering system helps to regulate watering, it’s still important to monitor the soil moisture and ensure that your plants are getting enough water.
* Fertilizing: Sweet peppers are heavy feeders and need regular fertilization to produce a good crop. Use a balanced fertilizer that’s specifically formulated for vegetables.
* Pollination: Sweet peppers are self-pollinating, but they can benefit from hand-pollination, especially if you’re growing them indoors or in a greenhouse. To hand-pollinate your plants, simply use a small brush to transfer pollen from one flower to another.
* Pest Control: Keep an eye out for common sweet pepper pests, such as aphids, whiteflies, and spider mites. Treat infestations promptly with insecticidal soap or neem oil.
Adapting the Design:
* Larger Plants: For larger sweet pepper varieties, you might need to use larger bottles or even buckets to provide enough space for the roots to grow.
* Multiple Plants: You can create larger self-watering planters by using larger containers and planting multiple sweet pepper seedlings in the same container. Just make sure to space them adequately to allow for proper growth.
* Vertical Gardening: You can adapt this DIY project to create a vertical garden by hanging the self-watering planters from a fence or wall. This is a great way to save space and add a touch of greenery to your outdoor area.
Benefits of Self-Watering Planters:
* Conserves Water: Self-watering planters help to conserve water by delivering water directly to the roots of the plants, minimizing evaporation and runoff.
* Reduces Watering Frequency: With a self-watering system, you don’t need to water your plants as often, which
Conclusion
So, there you have it! Transforming humble plastic bottles into miniature greenhouses for your sweet peppers is not just a clever upcycling project; it’s a game-changer for your garden. This DIY trick offers a multitude of benefits, from extending the growing season and protecting your precious peppers from unpredictable weather to creating a warmer, more humid microclimate that encourages faster growth and higher yields.
Why is this a must-try? Because it’s simple, cost-effective, and incredibly rewarding. You’re giving discarded plastic a new lease on life while simultaneously nurturing healthy, vibrant sweet pepper plants. It’s a win-win for you and the environment. Imagine harvesting baskets overflowing with juicy, colorful sweet peppers, all thanks to a few repurposed plastic bottles. The satisfaction is unparalleled.
But the beauty of this DIY project lies in its adaptability. Feel free to experiment with different types of plastic bottles. Larger bottles can accommodate larger pepper varieties, while smaller bottles are perfect for starting seedlings. You can also adjust the ventilation by creating more or fewer holes, depending on your local climate and the specific needs of your sweet peppers. Consider painting the bottles white to reflect excess sunlight in hotter climates, or adding a layer of mulch around the base of the bottle to retain moisture.
Don’t be afraid to get creative! You could even use this technique for other heat-loving plants like tomatoes, eggplants, or even certain herbs. The possibilities are endless.
We wholeheartedly encourage you to give this **plastic bottle sweet peppers** growing method a try. It’s a fantastic way to reduce waste, save money, and enjoy a bountiful harvest of delicious, homegrown peppers. And most importantly, we want to hear about your experiences! Share your photos, tips, and tricks in the comments below. Let’s build a community of resourceful gardeners who are passionate about sustainable practices and delicious, homegrown food. What worked for you? What challenges did you face? Your insights will help others succeed and inspire even more people to embrace this innovative gardening technique. So, grab those plastic bottles, get your hands dirty, and let the sweet pepper growing adventure begin! We can’t wait to see what you create.
Frequently Asked Questions (FAQ)
1. What types of plastic bottles are best for this project?
Ideally, you want to use clear plastic bottles that are relatively sturdy. Water bottles, soda bottles, and juice bottles all work well. Avoid using bottles that have contained harsh chemicals or cleaning products, as these could contaminate your soil and harm your plants. Make sure to thoroughly clean the bottles with soap and water before using them. The size of the bottle will depend on the size of your pepper plant and how long you plan to use it as a mini-greenhouse. Larger bottles offer more space for growth.
2. How do I prepare the plastic bottle for planting?
First, thoroughly clean the bottle inside and out with soap and water. Remove any labels or adhesive residue. Next, cut off the bottom of the bottle. The height of the cut will depend on how much of the plant you want to cover. You can also cut a few small ventilation holes near the top of the bottle to prevent overheating and excessive humidity. These holes will allow for air circulation and help to regulate the temperature inside the bottle.
3. When is the best time to use this DIY trick?
This technique is particularly useful in early spring when temperatures are still cool, or in late fall when the first frosts are approaching. It can also be beneficial during periods of unexpected cold snaps or heavy rain. The plastic bottle acts as a barrier, protecting your sweet pepper plants from the elements and extending the growing season. You can start using the bottles as soon as you transplant your seedlings into the garden.
4. How often should I water my sweet pepper plants when using plastic bottle covers?
The frequency of watering will depend on the weather conditions and the type of soil you’re using. However, because the plastic bottle creates a more humid environment, you’ll likely need to water less frequently than you would without the cover. Check the soil moisture regularly by sticking your finger into the soil. If the top inch or two feels dry, it’s time to water. Be careful not to overwater, as this can lead to root rot.
5. What if the weather gets too hot?
Overheating is a potential concern, especially in warmer climates. To prevent this, make sure you have adequate ventilation. Increase the size or number of ventilation holes in the bottle. You can also temporarily remove the bottle during the hottest part of the day. Consider painting the bottles white to reflect sunlight and reduce heat absorption. Another option is to provide shade for your plants during the hottest hours.
6. Can I use this method for other plants besides sweet peppers?
Yes, this technique can be adapted for other heat-loving plants such as tomatoes, eggplants, and even some herbs. The key is to choose a bottle size that is appropriate for the plant you’re growing and to adjust the ventilation as needed. Experiment and see what works best for you and your garden.
7. How long can I leave the plastic bottles on my sweet pepper plants?
You can leave the bottles on your plants until they outgrow them or until the weather warms up consistently. Once the risk of frost has passed and the temperatures are consistently warm, you can remove the bottles altogether. However, you can also continue to use them as a form of protection against pests and diseases.
8. What are some other ways to protect my sweet pepper plants?
In addition to using plastic bottle covers, you can also use row covers, cloches, or cold frames to protect your sweet pepper plants from the elements. Mulching around the base of the plants can help to retain moisture and regulate soil temperature. Regular monitoring for pests and diseases is also essential for maintaining healthy plants.
9. How does this DIY trick help the environment?
By repurposing plastic bottles, you’re reducing waste and preventing them from ending up in landfills or polluting the environment. You’re also reducing your reliance on commercially produced gardening supplies, which often have a significant environmental footprint. This DIY project is a simple but effective way to practice sustainable gardening and contribute to a healthier planet.
10. Where can I find more information about growing sweet peppers?
There are many excellent resources available online and in libraries. Look for information from reputable sources such as university extension services, gardening organizations, and experienced gardeners. You can also find helpful tips and advice in gardening books and magazines. Don’t be afraid to experiment and learn from your own experiences. Growing sweet peppers can be a rewarding and enjoyable experience.


Leave a Comment