
Purple Bush Bean Gardening: Your Guide to a Bountiful Harvest
Purple bush bean gardening isn’t just about growing food; it’s about cultivating a vibrant, colorful addition to your landscape and enjoying the freshest, most flavorful beans you’ve ever tasted. I’ve always loved the idea of homegrown vegetables, but the thought of sprawling vines and endless weeding often felt overwhelming. That’s why I’m so passionate about sharing my Purple Bush Bean Gardening tips – they’re designed to make growing these beautiful and delicious beans simple and rewarding, even for beginners!
The history of beans is fascinating! They’ve been a staple food source for thousands of years, cultivated across various cultures for their nutritional value and versatility. While the vibrant purple hue of these beans might seem modern, their ancestors have been feeding families for generations. But let’s be honest, the real reason we’re here is to learn how to successfully grow our own purple beauties.
Why Choose Purple Bush Beans?
Purple Bush Bean Gardening offers several advantages. Bush beans are compact, making them perfect for smaller gardens or containers. They require less space and maintenance than their pole bean counterparts, which is a huge plus for busy individuals. Plus, the stunning purple pods add a splash of color to your garden, making it a visually appealing space. And let’s not forget the incredible taste! These beans are incredibly delicious, whether you enjoy them fresh from the vine or preserved for later.
In this article, I’ll walk you through everything you need to know about successful Purple Bush Bean Gardening, from seed selection and planting to harvesting and preserving your bounty. Get ready to experience the joy of homegrown vegetables and the satisfaction of nurturing your own thriving garden. Let’s get started!
My Purple Bush Bean Gardening Adventure: A Complete Guide
I’ve always loved the vibrant color of purple beans, and this year I decided to grow my own! It turned out to be a more rewarding experience than I anticipated. Here’s my step-by-step guide to help you grow your own purple bush beans.
Phase 1: Planning and Preparation
- Choose the right variety: Research different purple bush bean varieties. Consider factors like maturity time, yield, and disease resistance. I chose ‘Purple King’ for its beautiful deep purple color and relatively short growing season.
- Select your location: Purple bush beans need at least six hours of direct sunlight per day. Choose a sunny spot in your garden with well-drained soil. Avoid areas prone to flooding or strong winds.
- Prepare the soil: Healthy soil is crucial for healthy plants. I amended my soil with compost to improve drainage, aeration, and nutrient content. A soil test can help determine if you need to add any specific nutrients.
- Gather your supplies: You’ll need bean seeds, garden trowel, watering can, garden gloves, and possibly some fertilizer (depending on your soil test results). I also used plant markers to keep track of my rows.
Phase 2: Planting Your Purple Bush Beans
- Prepare the planting area: Loosen the soil to a depth of about 12 inches. This allows the roots to penetrate easily. Remove any rocks or weeds.
- Plant the seeds: Plant the seeds about 1 inch deep and 2-3 inches apart. I planted my beans in rows about 18 inches apart. This spacing allows for good air circulation and prevents overcrowding.
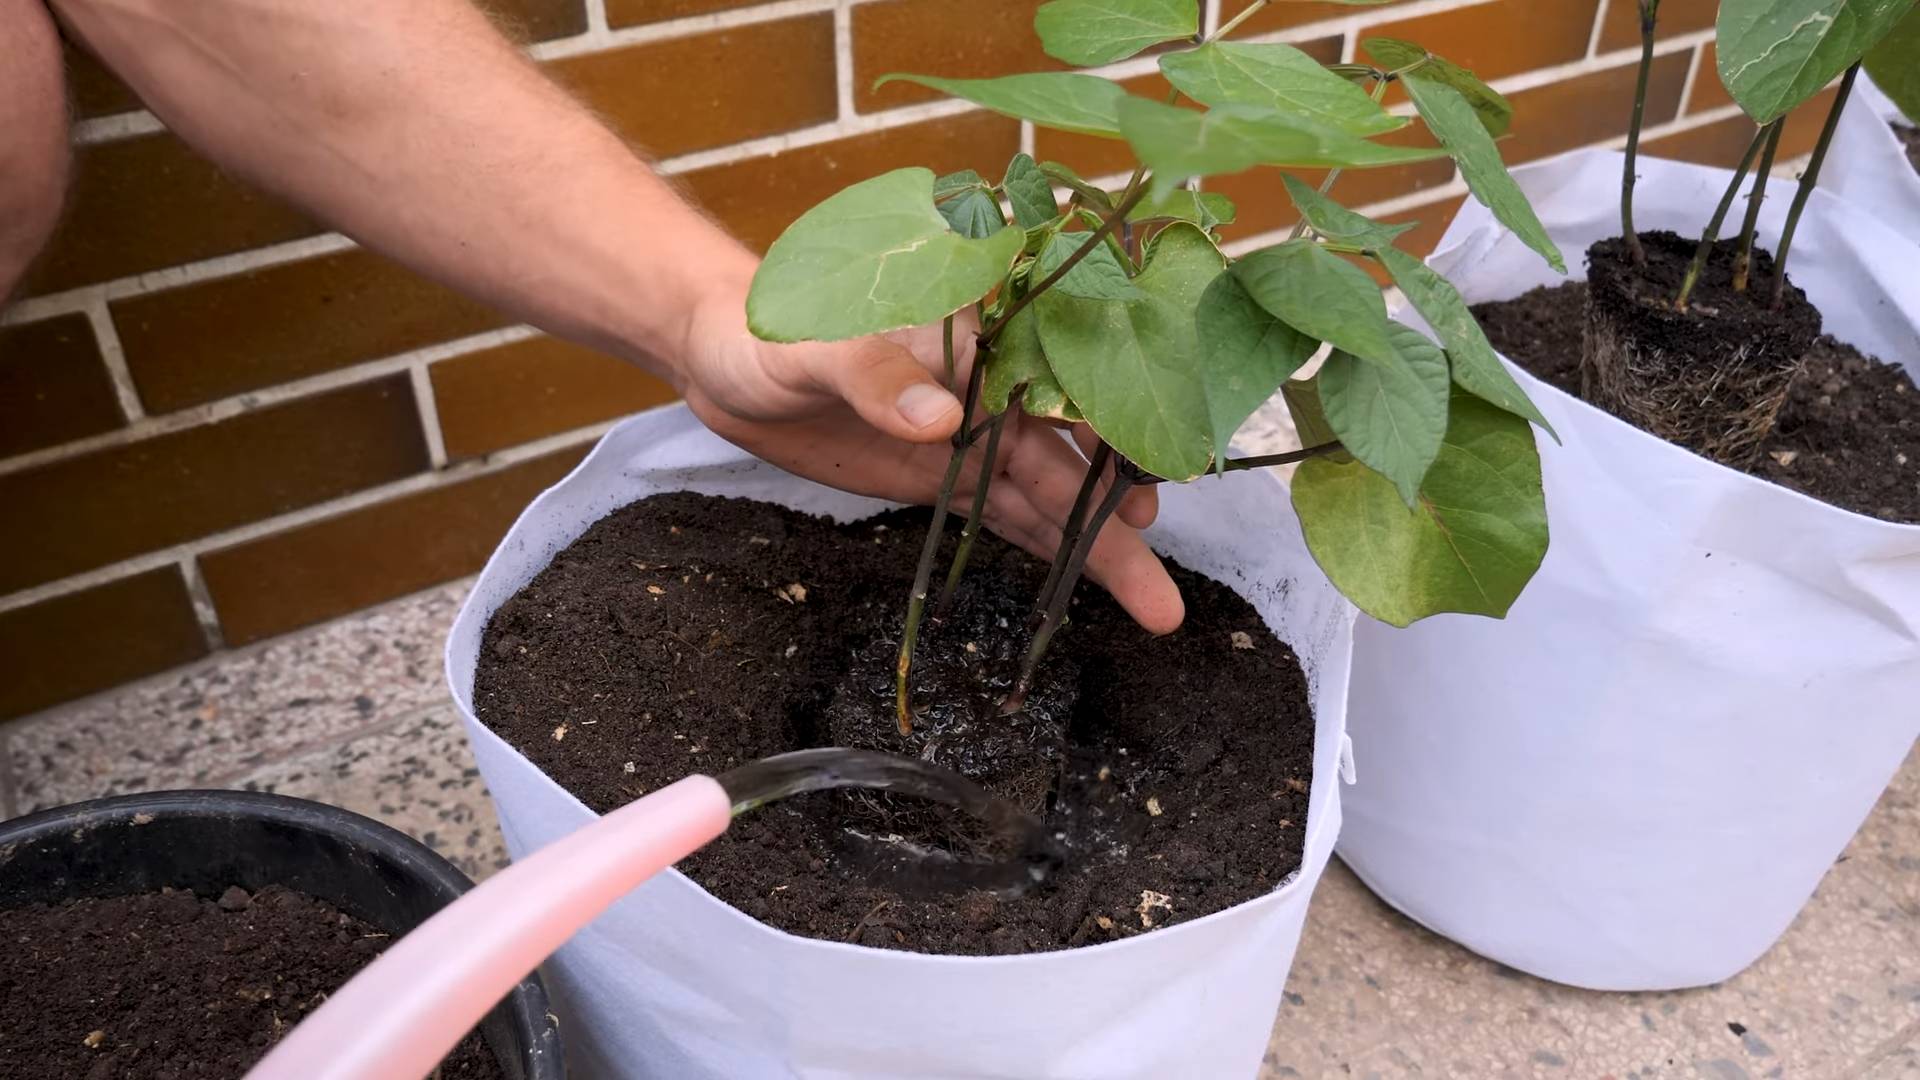
- Water gently: After planting, water the seeds thoroughly but gently. Avoid overwatering, which can lead to rot. A gentle soaking is best.
- Label your rows: Use plant markers to label your rows. This will help you keep track of your plants and avoid confusion later on.
Phase 3: Caring for Your Growing Beans
- Regular watering: Keep the soil consistently moist, but not soggy. Water deeply and less frequently rather than shallowly and often. The frequency will depend on your climate and weather conditions. I usually watered every other day during dry spells.
- Weed control: Regularly remove weeds to prevent competition for nutrients and water. Mulching can help suppress weed growth. I used straw mulch around my bean plants.
- Pest and disease monitoring: Regularly inspect your plants for signs of pests or diseases. Common bean pests include aphids and bean beetles. Early detection and treatment are crucial. I used a natural insecticidal soap to control aphids.
- Support (optional): While bush beans are generally self-supporting, you can provide support if needed, especially in windy areas. I didn’t need to provide support for my ‘Purple King’ beans.
- Fertilizing (if needed): Based on your soil test, you may need to fertilize your beans. Follow the instructions on the fertilizer package carefully. Over-fertilizing can be harmful.
Phase 4: Harvesting Your Purple Bush Beans
- Harvesting time: The harvesting time will depend on the variety you chose. Check the seed packet for the estimated maturity time. ‘Purple King’ beans typically mature in around 50-55 days.
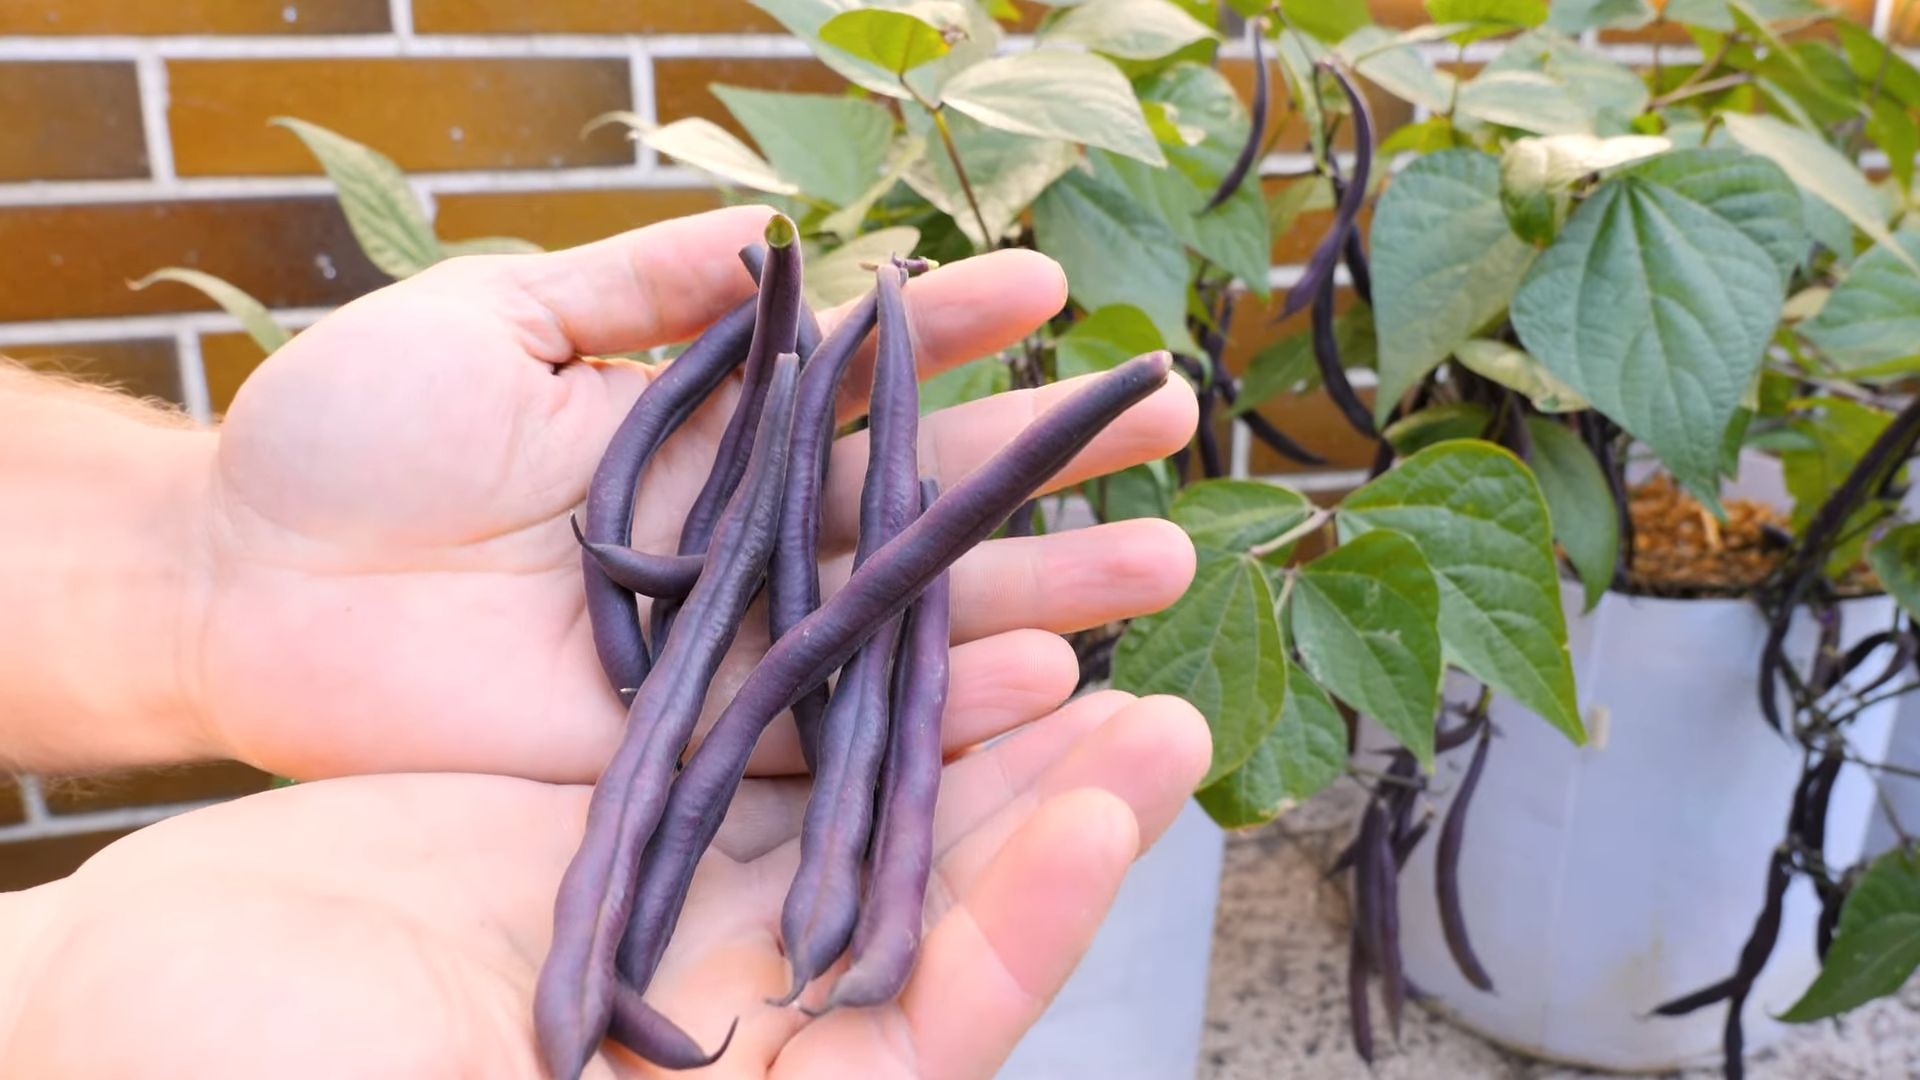
- How to harvest: Harvest the beans when they are young and tender. The pods should be plump and firm, but not overly large or tough. Snap the pods off the plant at the stem.
- Storage: Store your harvested beans in the refrigerator for up to a week. You can also freeze them for longer storage. Blanch the beans before freezing to maintain their quality.
- Enjoy your harvest: Purple bush beans are delicious! Enjoy them fresh in salads, stir-fries, or as a side dish. They retain their vibrant color even after cooking.
Phase 5: Troubleshooting Common Problems
Problem: Yellowing Leaves
Yellowing leaves can indicate several issues, including nutrient deficiencies, overwatering, or disease. Check your watering practices and consider a soil test to determine if nutrients are lacking.
Problem: Bean Beetles
Bean beetles can cause significant damage. Handpick the beetles or use an insecticidal soap to control them. Consider using row covers to protect your plants.
Problem: Poor Germination
Poor germination can be due to planting too deep, dry soil, or cold temperatures. Ensure proper planting depth and keep the soil consistently moist.
Problem: Fungal Diseases
Fungal diseases can thrive in humid conditions. Ensure good air circulation around your plants and avoid overhead watering.
Remember:
Gardening is a learning process. Don’t be discouraged if you encounter challenges. Observe your plants, learn from your experiences, and adjust your techniques as needed. Happy gardening!
Conclusion
So there you have it – your comprehensive guide to achieving a bountiful harvest of purple bush beans! This DIY approach to purple bush bean gardening isn’t just about growing vegetables; it’s about connecting with nature, understanding the life cycle of your food, and experiencing the immense satisfaction of nurturing something from seed to plate. The beauty of this method lies in its simplicity and accessibility. You don’t need acres of land or specialized equipment; a small patch of sun-drenched soil and a little bit of patience are all you need to embark on this rewarding journey. This DIY purple bush bean gardening technique is a must-try for both seasoned gardeners and complete beginners because it offers a straightforward, efficient, and ultimately delicious way to grow your own vibrant purple beans. The vibrant color adds a unique touch to any dish, and the taste is undeniably fresh and flavorful, surpassing anything you’ll find in the supermarket.
Beyond the basic method outlined, there are countless ways to personalize your purple bush bean gardening experience. Experiment with companion planting! Consider interspersing your beans with herbs like basil or marigolds, known for their pest-repelling properties. This not only enhances the overall health of your plants but also adds another layer of flavor to your garden. You can also explore different varieties of purple bush beans; some boast larger pods, while others offer a more intense purple hue. Don’t be afraid to try different soil amendments to optimize your soil’s drainage and nutrient content. Compost, well-rotted manure, and even coffee grounds can work wonders. And remember, the success of your garden is directly related to the care and attention you provide. Regular watering, weeding, and pest monitoring are crucial steps in ensuring a healthy and productive harvest.
We strongly encourage you to try this DIY purple bush bean gardening technique and share your experiences with us! Whether you’re a seasoned gardener or a curious beginner, we’d love to hear about your successes, challenges, and any unique variations you’ve implemented. Share your photos and stories on social media using #PurpleBushBeanGardening – let’s build a community of passionate gardeners who are committed to growing their own delicious and vibrant purple beans. The journey of growing your own food is incredibly rewarding, and we believe that everyone should have the opportunity to experience the joy of harvesting their own homegrown produce. So, grab your seeds, prepare your soil, and get ready to embark on this exciting adventure. You might be surprised at how easy and fulfilling it is to cultivate your own purple bush bean paradise!
Frequently Asked Questions
What type of soil is best for purple bush beans?
Purple bush beans thrive in well-drained, loose soil rich in organic matter. A slightly acidic to neutral pH (6.0-7.0) is ideal. Amend heavy clay soils with compost or other organic materials to improve drainage and aeration. Sandy soils may benefit from the addition of organic matter to retain moisture.
How much sunlight do purple bush beans need?
Purple bush beans need at least six to eight hours of direct sunlight per day to grow optimally. Choose a location in your garden that receives ample sunlight throughout the day. Insufficient sunlight can lead to poor growth and reduced yields.
When is the best time to plant purple bush beans?
The best time to plant purple bush beans depends on your climate. In most regions, planting occurs after the last frost, when soil temperatures have warmed to at least 60°F (15°C). You can also start seeds indoors several weeks before the last frost for an earlier harvest.
How often should I water my purple bush beans?
Consistent watering is crucial for healthy purple bush bean plants. Aim to keep the soil consistently moist but not waterlogged. Water deeply and less frequently rather than shallowly and often. The frequency of watering will depend on your climate and soil conditions; check the soil moisture regularly.
What are some common pests and diseases that affect purple bush beans?
Common pests include aphids, bean beetles, and spider mites. Diseases include bean blight and anthracnose. Regularly inspect your plants for signs of pests or diseases. Consider using organic pest control methods such as insecticidal soap or neem oil to address infestations. Good garden hygiene, including removing plant debris, can help prevent disease.
How do I harvest purple bush beans?
Harvest purple bush beans when the pods are young, tender, and bright purple. Harvesting regularly encourages continued production. Snap the pods off the plant at their base using your fingers or a sharp knife. Avoid harvesting when the pods are overripe, as they will be tough and stringy.
Can I save seeds from my purple bush beans for next year?
Yes, you can save seeds from your purple bush beans for planting the following year. Allow some pods to mature fully on the plant until they turn dry and brown. Then, carefully remove the seeds from the pods and allow them to dry completely before storing them in a cool, dry place in an airtight container.
What are some creative ways to use purple bush beans in cooking?
Purple bush beans add a beautiful pop of color and a unique flavor to a wide range of dishes. They can be enjoyed fresh, steamed, sautéed, or roasted. They are delicious in salads, stir-fries, soups, and casseroles. Their vibrant color makes them a stunning addition to any plate, adding visual appeal to your culinary creations.


Leave a Comment