
Shaving Foam Cleaning Hacks: Who knew that the fluffy stuff you use to groom could be your secret weapon against household grime? I certainly didn’t, until I stumbled upon this treasure trove of cleaning tips! For generations, shaving foam has been a staple in men’s grooming routines, but its cleaning potential has remained largely untapped. Think about it – its creamy texture and mild detergents are designed to soften and lift, making it perfect for tackling stubborn stains and dirt.
In this article, I’m going to share some amazing DIY shaving foam cleaning hacks that will revolutionize your cleaning routine. Forget expensive specialty cleaners; shaving foam is often cheaper, readily available, and surprisingly effective. From banishing carpet stains to shining bathroom mirrors, these tricks will save you time, money, and effort.
Why do you need these hacks? Because life is too short to spend hours scrubbing! We all want a clean and tidy home, but not at the expense of our precious free time. These shaving foam cleaning hacks are quick, easy, and deliver fantastic results, allowing you to enjoy a sparkling clean home without breaking a sweat. So, grab a can of shaving foam, and let’s get cleaning!
Shaving Foam: Your Unexpected Cleaning Superhero!
Okay, friends, let’s talk about something you probably already have in your bathroom: shaving foam! Yes, that fluffy stuff you (or someone you know!) uses to get a smooth shave is actually a surprisingly versatile cleaning agent. I’ve been experimenting with it for a while now, and I’m amazed at how many things it can tackle. Forget expensive specialty cleaners; shaving foam is here to save the day (and your wallet!).
Why Shaving Foam?
You might be wondering, “Why shaving foam? What’s so special about it?” Well, it’s all about the ingredients. Most shaving foams contain a combination of soap, surfactants, and emollients. These work together to:
* Loosen dirt and grime: The soap and surfactants help break down the bonds between dirt and the surface you’re cleaning.
* Lift stains: The foam action helps lift stains away from fabrics and other materials.
* Provide lubrication: This prevents scratching and makes wiping easier.
* Leave a fresh scent: Most shaving foams have a pleasant, clean scent.
Important Note: Always test shaving foam on an inconspicuous area first, especially on delicate surfaces or fabrics. While it’s generally safe, it’s better to be cautious! Also, avoid using shaving gels, as they don’t have the same foaming action. Stick to the classic, foamy kind.
Cleaning Mirrors and Glass
This is one of my favorite shaving foam hacks! It leaves mirrors and glass sparkling clean and streak-free.
What You’ll Need:
* Shaving foam (the foamy kind, not gel)
* A clean, lint-free cloth or microfiber towel
Instructions:
1. Apply the Shaving Foam: Squirt a small amount of shaving foam directly onto the mirror or glass surface. You don’t need a ton; a little goes a long way.
2. Spread it Around: Use your fingers or the cloth to spread the foam evenly over the entire surface. Make sure to cover all areas, especially any spots with smudges or fingerprints.
3. Let it Sit: Allow the shaving foam to sit for a minute or two. This gives it time to loosen the dirt and grime.
4. Wipe it Clean: Using a clean, lint-free cloth or microfiber towel, wipe away the shaving foam. Use circular motions to ensure you’re removing all the residue.
5. Buff to a Shine: If you notice any streaks, use a dry, clean section of the cloth to buff the surface to a sparkling shine.
Pro Tip: This also works great on bathroom mirrors to prevent fogging! Just apply a thin layer of shaving foam, wipe it off, and your mirror will stay clear even after a hot shower.
Removing Carpet Stains
Accidents happen! But don’t despair; shaving foam can often come to the rescue when you’re dealing with carpet stains.
What You’ll Need:
* Shaving foam (again, the foamy kind!)
* A clean, damp cloth or sponge
* A vacuum cleaner
Instructions:
1. Apply the Shaving Foam: Apply a generous amount of shaving foam directly onto the stain. Make sure the stain is completely covered.
2. Let it Soak: Allow the shaving foam to soak into the stain for at least 15-20 minutes. For tougher stains, you can let it sit for up to an hour.
3. Blot the Stain: Using a clean, damp cloth or sponge, gently blot the stain. Avoid rubbing, as this can spread the stain and damage the carpet fibers. Work from the outside of the stain towards the center.
4. Rinse (Optional): If you feel like there’s too much shaving foam residue, you can lightly rinse the area with a small amount of clean water. Be careful not to over-wet the carpet.
5. Dry the Area: Use a clean, dry towel to blot up any excess moisture. You can also use a fan to help speed up the drying process.
6. Vacuum: Once the carpet is completely dry, vacuum the area to restore the carpet fibers and remove any remaining residue.
Important Note: This method works best on fresh stains. For older, set-in stains, you may need to repeat the process or try a different cleaning solution.
Cleaning Stainless Steel
Stainless steel appliances can be a pain to keep clean, but shaving foam can help! It removes fingerprints, smudges, and water spots, leaving your appliances looking shiny and new.
What You’ll Need:
* Shaving foam
* A clean, soft cloth or microfiber towel
Instructions:
1. Apply the Shaving Foam: Apply a small amount of shaving foam directly onto the stainless steel surface.
2. Spread it Around: Use the cloth to spread the foam evenly over the surface.
3. Wipe it Clean: Wipe away the shaving foam with the cloth, using circular motions.
4. Buff to a Shine: Use a clean, dry section of the cloth to buff the surface to a shine.
Pro Tip: This works great on refrigerators, dishwashers, ovens, and even stainless steel sinks!
Polishing Chrome Fixtures
Shaving foam can also be used to polish chrome fixtures, such as faucets, showerheads, and towel racks. It removes water spots and tarnish, leaving them looking bright and shiny.
What You’ll Need:
* Shaving foam
* A clean, soft cloth or microfiber towel
Instructions:
1. Apply the Shaving Foam: Apply a small amount of shaving foam directly onto the chrome fixture.
2. Spread it Around: Use the cloth to spread the foam evenly over the surface.
3. Let it Sit: Allow the shaving foam to sit for a few minutes to loosen any tarnish or water spots.
4. Wipe it Clean: Wipe away the shaving foam with the cloth, using circular motions.
5. Buff to a Shine: Use a clean, dry section of the cloth to buff the surface to a shine.
Pro Tip: For stubborn tarnish, you can let the shaving foam sit for a longer period of time, up to 30 minutes.
Cleaning Jewelry
Believe it or not, shaving foam can even be used to clean some types of jewelry! It’s gentle enough to remove dirt and grime without damaging delicate stones or metals.
What You’ll Need:
* Shaving foam
* A soft-bristled toothbrush
* Warm water
* A clean, soft cloth
Instructions:
1. Apply the Shaving Foam: Apply a small amount of shaving foam to the jewelry.
2. Gently Scrub: Use a soft-bristled toothbrush to gently scrub the jewelry, paying attention to any crevices or areas with dirt buildup.
3. Rinse Thoroughly: Rinse the jewelry thoroughly with warm water to remove all traces of shaving foam.
4. Dry Carefully: Use a clean, soft cloth to dry the jewelry carefully.
Important Note: This method is best for cleaning gold, silver, and platinum jewelry. Avoid using it on delicate gemstones like pearls, opals, or emeralds, as the shaving foam could damage them. Always test on a small, inconspicuous area first.
Removing Paint Splatters
If you’ve been doing some painting and accidentally got paint splatters on your skin or clothing, shaving foam can help!
What You’ll Need:
* Shaving foam
* A clean cloth or sponge
* Warm water
Instructions (For Skin):
1. Apply the Shaving Foam: Apply a generous amount of shaving foam to the paint splatter on your skin.
2. Let it Sit: Allow the shaving foam to sit for a few minutes to soften the paint.
3. Wipe it Away: Gently wipe away the shaving foam and paint with a clean cloth or sponge.
4. Rinse with Water: Rinse the area with warm water to remove any remaining residue.
Instructions (For Clothing):
1. Apply the Shaving Foam: Apply shaving foam to the paint splatter on the clothing.
2. Let it Sit: Allow the shaving foam to sit for 10-15 minutes.
3. Blot the Stain: Gently blot the stain with a clean cloth.
4. Launder as Usual: Launder the clothing as usual.
Important Note: This works best on fresh paint splatters. For dried paint, you may need to use a different method.
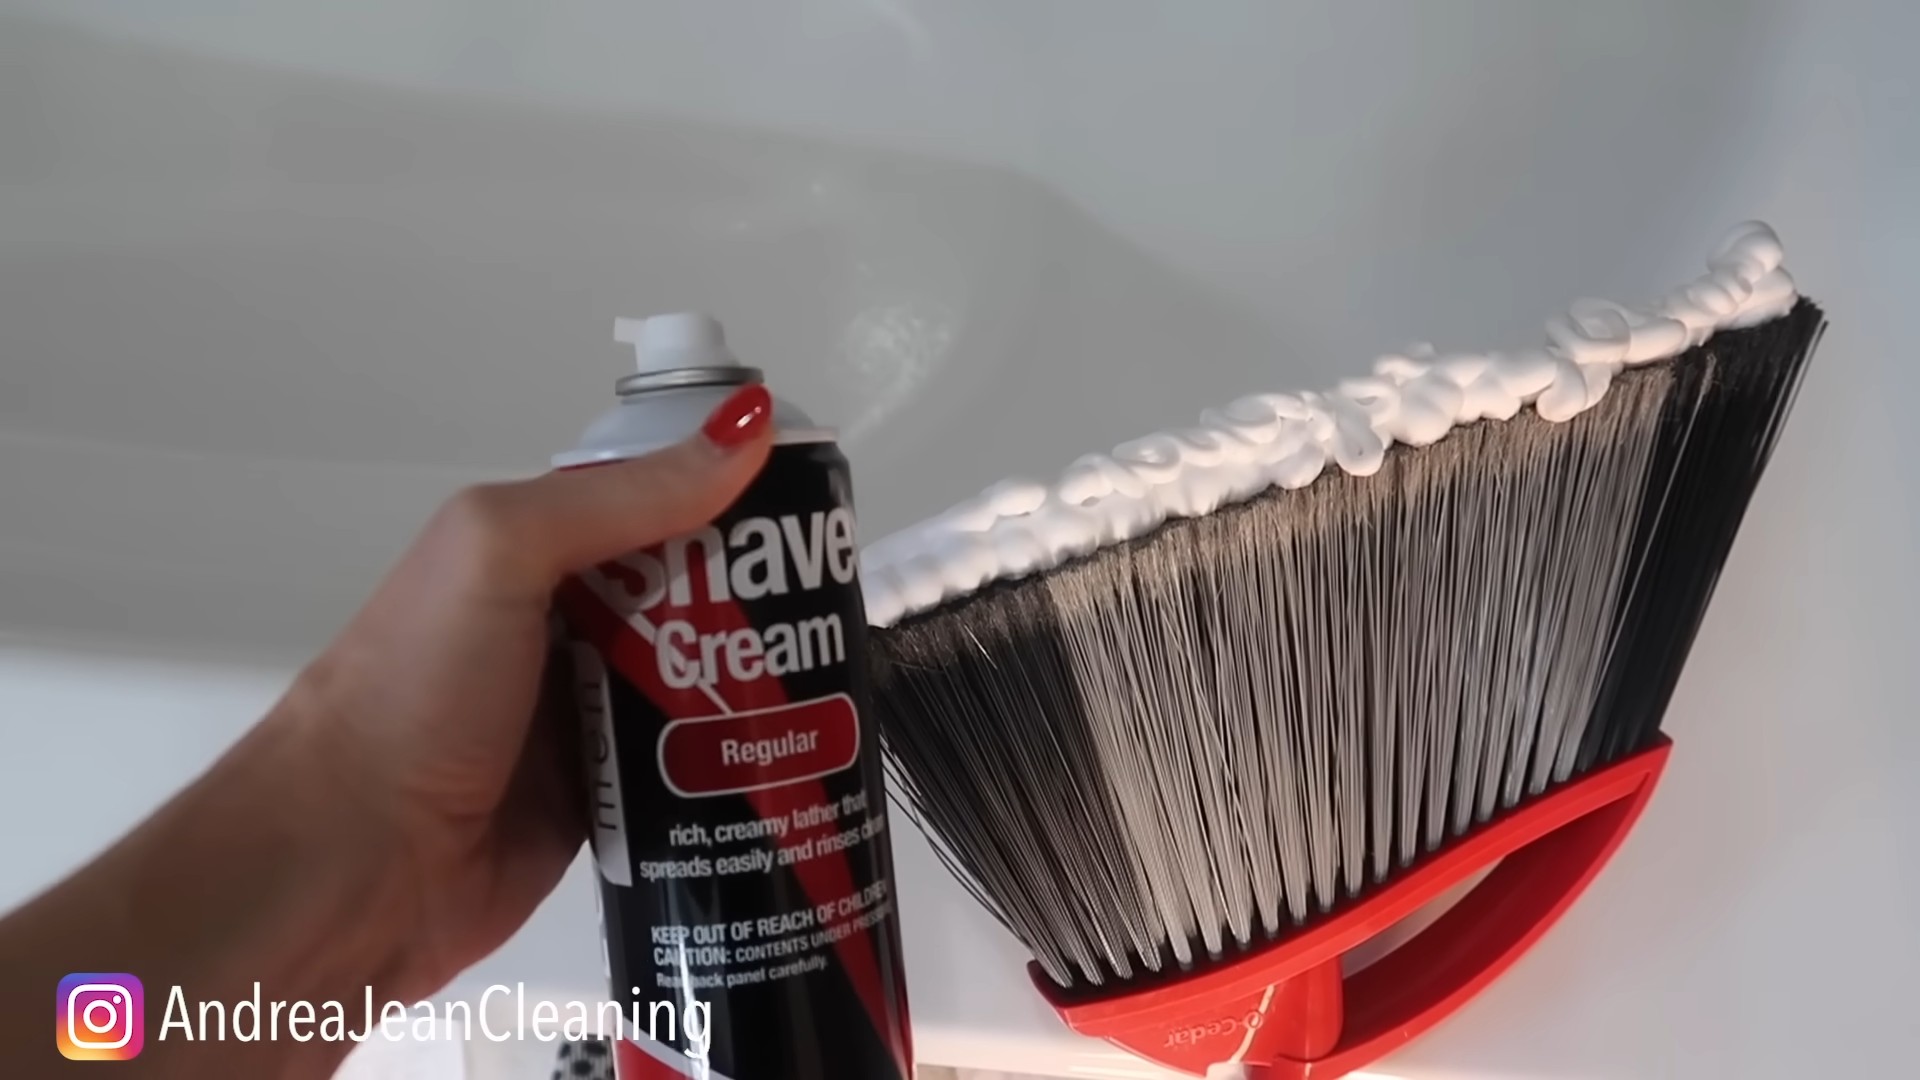
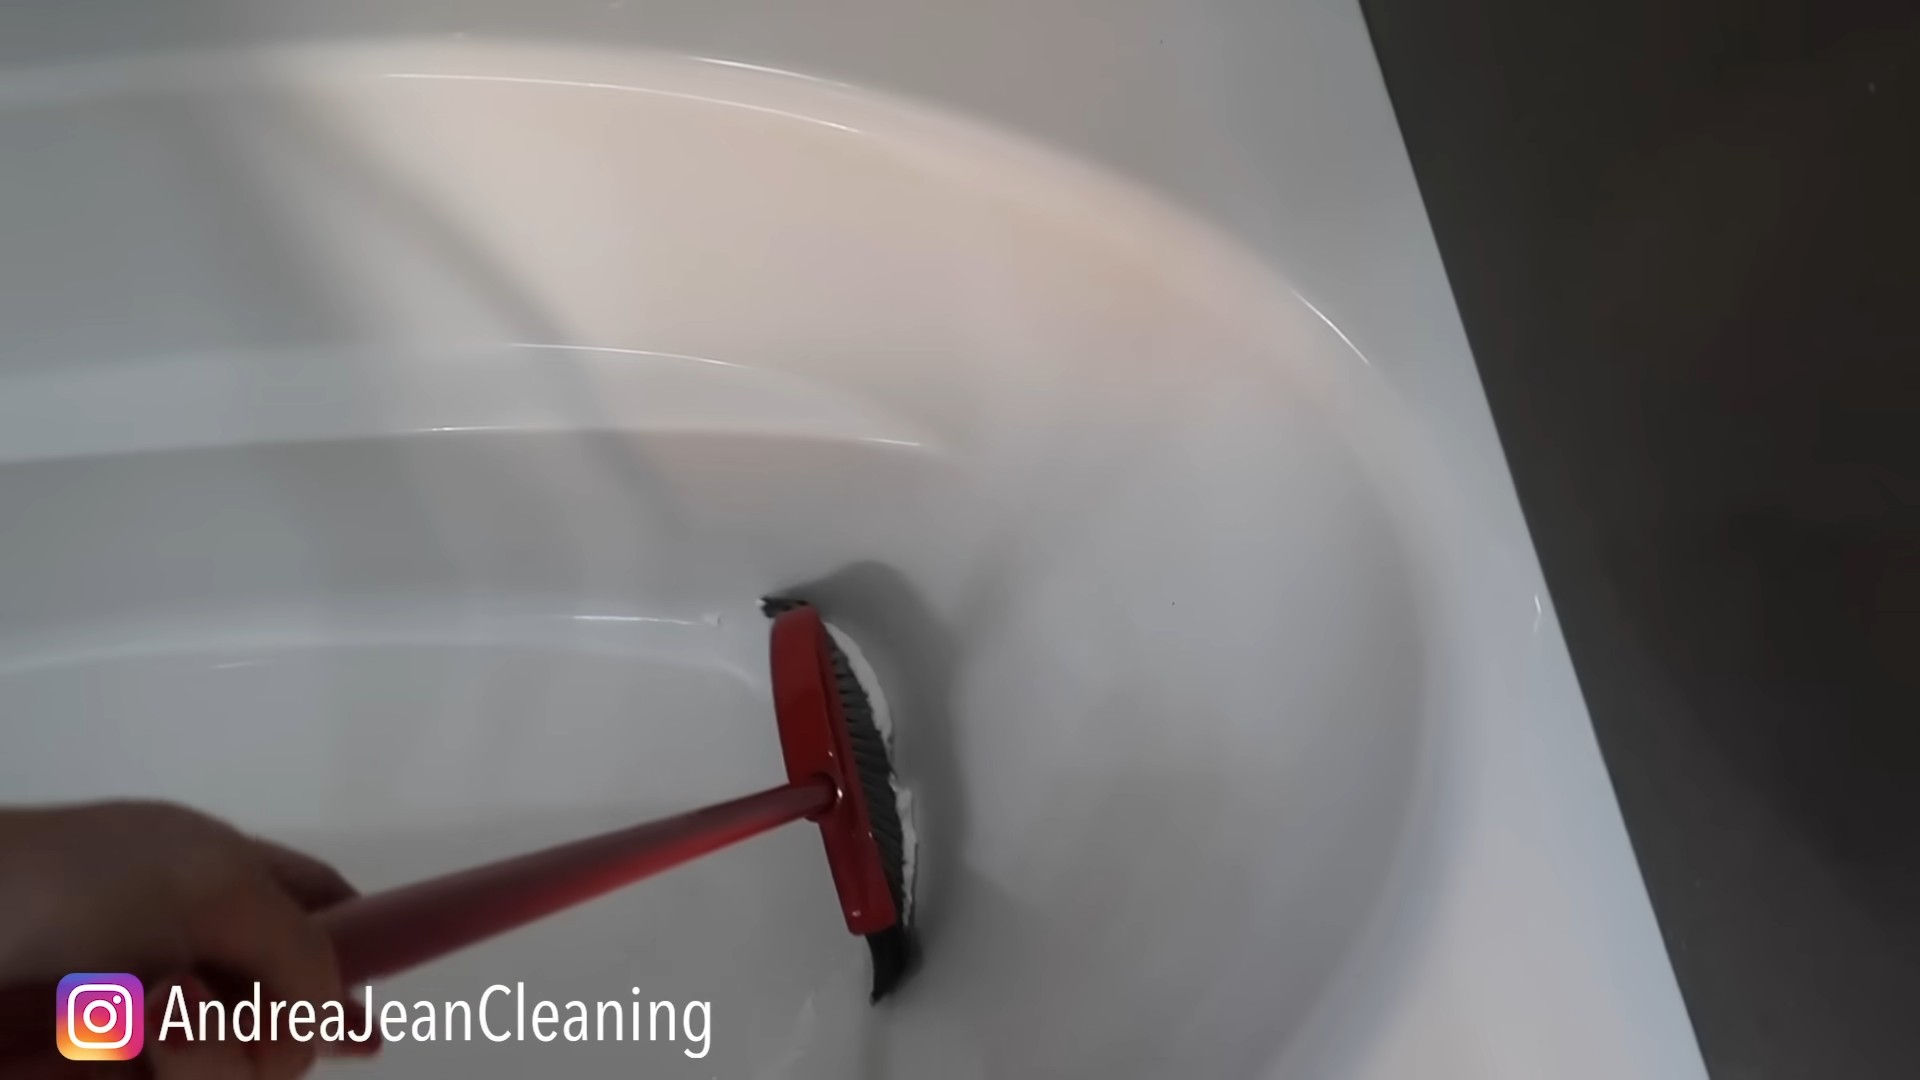
Cleaning Bathroom Fixtures
Shaving foam is great for cleaning bathroom fixtures like sinks, toilets, and bathtubs. It helps remove soap scum, hard water stains, and other grime.
What You’ll Need:
Conclusion
So, there you have it! Shaving foam isn’t just for a smooth shave; it’s a surprisingly versatile and effective cleaning agent that can tackle a multitude of household messes. From banishing stubborn stains on carpets and upholstery to restoring shine to your bathroom fixtures and even pre-treating laundry, this humble product packs a powerful cleaning punch.
Why is this DIY cleaning trick a must-try? Because it’s cost-effective, readily available, and often gentler than harsh chemical cleaners. You likely already have a can of shaving foam tucked away in your bathroom, making it an incredibly convenient solution for tackling unexpected spills and grime. Plus, it’s a fantastic way to reduce your reliance on potentially harmful chemicals in your home, creating a healthier and safer environment for you and your family.
But the possibilities don’t stop there! Feel free to experiment with variations to suit your specific needs. For instance, for extra cleaning power on tough stains, try adding a few drops of lemon essential oil to your shaving foam mixture. The lemon oil will not only boost the cleaning action but also leave behind a fresh, citrusy scent. Alternatively, for delicate surfaces, opt for a sensitive skin shaving foam to minimize the risk of damage or discoloration. You can even use different scents of shaving foam to add a pleasant fragrance to the cleaned area. Lavender shaving foam for cleaning your bedroom might promote relaxation, while citrus-scented foam could invigorate your bathroom.
Don’t be afraid to get creative and adapt this DIY cleaning trick to your unique cleaning challenges. The key is to start with a small, inconspicuous area to test the shaving foam’s effect before applying it to larger surfaces.
We’re confident that once you experience the cleaning magic of shaving foam, you’ll be hooked! It’s a game-changer for anyone looking for a simple, effective, and budget-friendly way to keep their home sparkling clean.
Now, it’s your turn! We encourage you to try these shaving foam cleaning hacks and discover the amazing results for yourself. Share your experiences, tips, and variations in the comments below. We’d love to hear how shaving foam has transformed your cleaning routine! Let us know what surfaces you’ve cleaned, what stains you’ve conquered, and any creative ways you’ve adapted this versatile cleaning solution. Your insights could inspire others to embrace the power of shaving foam and unlock its full cleaning potential. Let’s build a community of savvy cleaners, one can of shaving foam at a time!
Frequently Asked Questions (FAQs)
Is shaving foam safe to use on all surfaces?
While shaving foam is generally considered safe for most surfaces, it’s always best to test it on a small, inconspicuous area first. This is especially important for delicate materials like leather, silk, or certain types of painted surfaces. Apply a small amount of shaving foam, let it sit for a few minutes, and then wipe it away with a clean, damp cloth. Observe the area for any signs of discoloration, damage, or residue. If everything looks good, you can proceed with cleaning the entire surface. Avoid using shaving foam on surfaces that are known to be sensitive to moisture or chemicals.
What type of shaving foam works best for cleaning?
Most types of shaving foam will work for cleaning purposes, but the best option is typically a basic, non-gel formula. These foams tend to be less sticky and easier to rinse away. Avoid using shaving gels, as they can leave a residue that’s difficult to remove. Sensitive skin shaving foams are also a good choice, especially for delicate surfaces, as they are formulated to be gentler and less likely to cause irritation or damage. Ultimately, the best type of shaving foam for cleaning is the one that works best for your specific needs and the surfaces you’re cleaning.
Can I use shaving foam to clean electronics?
No, it is generally not recommended to use shaving foam to clean electronics. Electronics are sensitive to moisture, and the wetness of shaving foam could potentially damage internal components. Instead, use a dry microfiber cloth or a specialized electronic cleaning solution to safely clean your electronic devices. Always unplug the device before cleaning and avoid spraying any liquids directly onto the screen or ports.
How long should I leave the shaving foam on a stain before wiping it away?
The amount of time you should leave shaving foam on a stain depends on the severity of the stain and the type of surface. For light stains, a few minutes may be sufficient. For more stubborn stains, you can leave the shaving foam on for up to 15-20 minutes. However, it’s important to monitor the area and ensure that the shaving foam doesn’t dry out completely, as this can make it more difficult to remove. After the allotted time, wipe away the shaving foam with a clean, damp cloth and rinse the area thoroughly.
Will shaving foam damage my carpet or upholstery?
Shaving foam is generally safe to use on carpets and upholstery, but it’s always a good idea to test it on a hidden area first. Apply a small amount of shaving foam to an inconspicuous spot, such as under a sofa cushion or in a corner of the carpet. Let it sit for a few minutes, then wipe it away with a clean, damp cloth. Check for any signs of discoloration, damage, or residue. If everything looks good, you can proceed with cleaning the entire area. When cleaning carpets or upholstery, avoid over-saturating the fabric with shaving foam, as this can lead to mildew growth.
Can I use shaving foam to remove hard water stains?
Yes, shaving foam can be effective in removing hard water stains from bathroom fixtures like faucets, showerheads, and tiles. The mild acidity of shaving foam helps to dissolve mineral deposits and soap scum, leaving your fixtures sparkling clean. Apply a generous amount of shaving foam to the affected area, let it sit for a few minutes, and then scrub with a soft brush or sponge. Rinse thoroughly with water and dry with a clean cloth. For stubborn hard water stains, you may need to repeat the process or use a more abrasive cleaning tool.
Does shaving foam work on grease stains?
Shaving foam can be helpful in pre-treating grease stains on clothing or fabrics. Apply a generous amount of shaving foam to the grease stain, gently massage it into the fabric, and let it sit for about 15-20 minutes. The shaving foam will help to break down the grease and lift it away from the fibers. After the allotted time, rinse the area with water and launder the garment as usual. For particularly stubborn grease stains, you may need to repeat the process or use a specialized grease stain remover.
How do I remove shaving foam residue after cleaning?
To remove shaving foam residue after cleaning, simply wipe the area with a clean, damp cloth. Rinse the cloth frequently to remove any remaining shaving foam. For larger areas, you may need to use a bucket of clean water and a sponge. Ensure that you remove all traces of shaving foam to prevent any sticky or soapy residue from attracting dirt and grime. Dry the area thoroughly with a clean towel to prevent water spots.
Can I add essential oils to shaving foam for cleaning?
Yes, you can add essential oils to shaving foam for cleaning to enhance its cleaning power and add a pleasant fragrance. Lemon essential oil is a popular choice for its degreasing and disinfecting properties. Tea tree oil is another great option for its antibacterial and antifungal benefits. Lavender essential oil can add a calming scent to your cleaning routine. Simply add a few drops of your favorite essential oil to the shaving foam before applying it to the surface you’re cleaning. Be sure to test the mixture on a small, inconspicuous area first to ensure that the essential oil doesn’t damage or discolor the surface.
Is shaving foam a good alternative to traditional cleaning products?
Shaving foam can be a surprisingly effective and versatile alternative to traditional cleaning products for certain tasks. It’s a cost-effective, readily available, and often gentler option that can tackle a variety of household messes. However, it’s important to note that shaving foam may not be suitable for all cleaning tasks. For heavy-duty cleaning or disinfecting, you may still need to rely on traditional cleaning products. But for everyday spills, stains, and grime, shaving foam can be a valuable addition to your cleaning arsenal.

Leave a Comment