
Strawberry plastic bottle gardening: who knew turning trash into treasure could be so delicious? I’m so excited to share this incredibly rewarding and surprisingly simple DIY project with you! Forget those expensive planters and cramped garden beds – we’re about to unlock a world of juicy, homegrown strawberries using something you probably already have lying around: plastic bottles!
Vertical gardening, in general, has a rich history, dating back to the Hanging Gardens of Babylon, one of the Seven Wonders of the Ancient World. While our plastic bottle version might not be quite as grand, it taps into that same ingenious spirit of maximizing space and bringing greenery into our lives. For centuries, people have sought creative ways to cultivate plants in limited areas, and this modern twist is perfect for urban dwellers, apartment residents, or anyone looking to add a touch of sustainable charm to their home.
Why do you need this DIY trick? Well, imagine plucking fresh, sun-ripened strawberries right from your balcony or windowsill. No more questionable supermarket berries! Plus, strawberry plastic bottle gardening is a fantastic way to recycle, reduce waste, and teach kids about the wonders of growing their own food. It’s a win-win-win! So, grab those empty plastic bottles, and let’s get started on this fun and fruitful adventure together. I promise, you’ll be amazed at how easy it is to create your own little strawberry paradise!
Strawberry Garden from Plastic Bottles: A DIY Guide
Hello dear garden friends! Do you fancy fresh strawberries but have limited space? Then I have the perfect DIY project for you: a vertical strawberry garden made from old plastic bottles! This is not only super sustainable because we are upcycling plastic waste, but it’s also space-saving and looks really cool. Let’s get started!
What you’ll need:
- Many plastic bottles (preferably the same size, e.g., 1.5-liter bottles)
- A sharp knife or scissors
- A drill or a nail and hammer
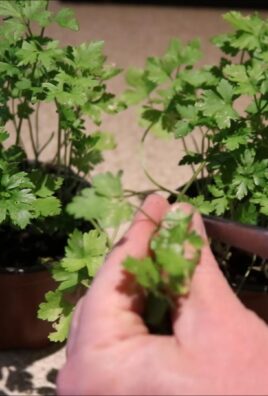
- Soil (preferably strawberry or vegetable soil)
- Strawberry plants (small seedlings are ideal)
- A sturdy string or wire
- Optional: Spray paint (to decorate the bottles)
- Optional: Fleece or jute (to better hold the soil)
Preparing the Bottles
Before we start the actual construction, we need to prepare the bottles. This is an important step to ensure our vertical garden functions well later on.
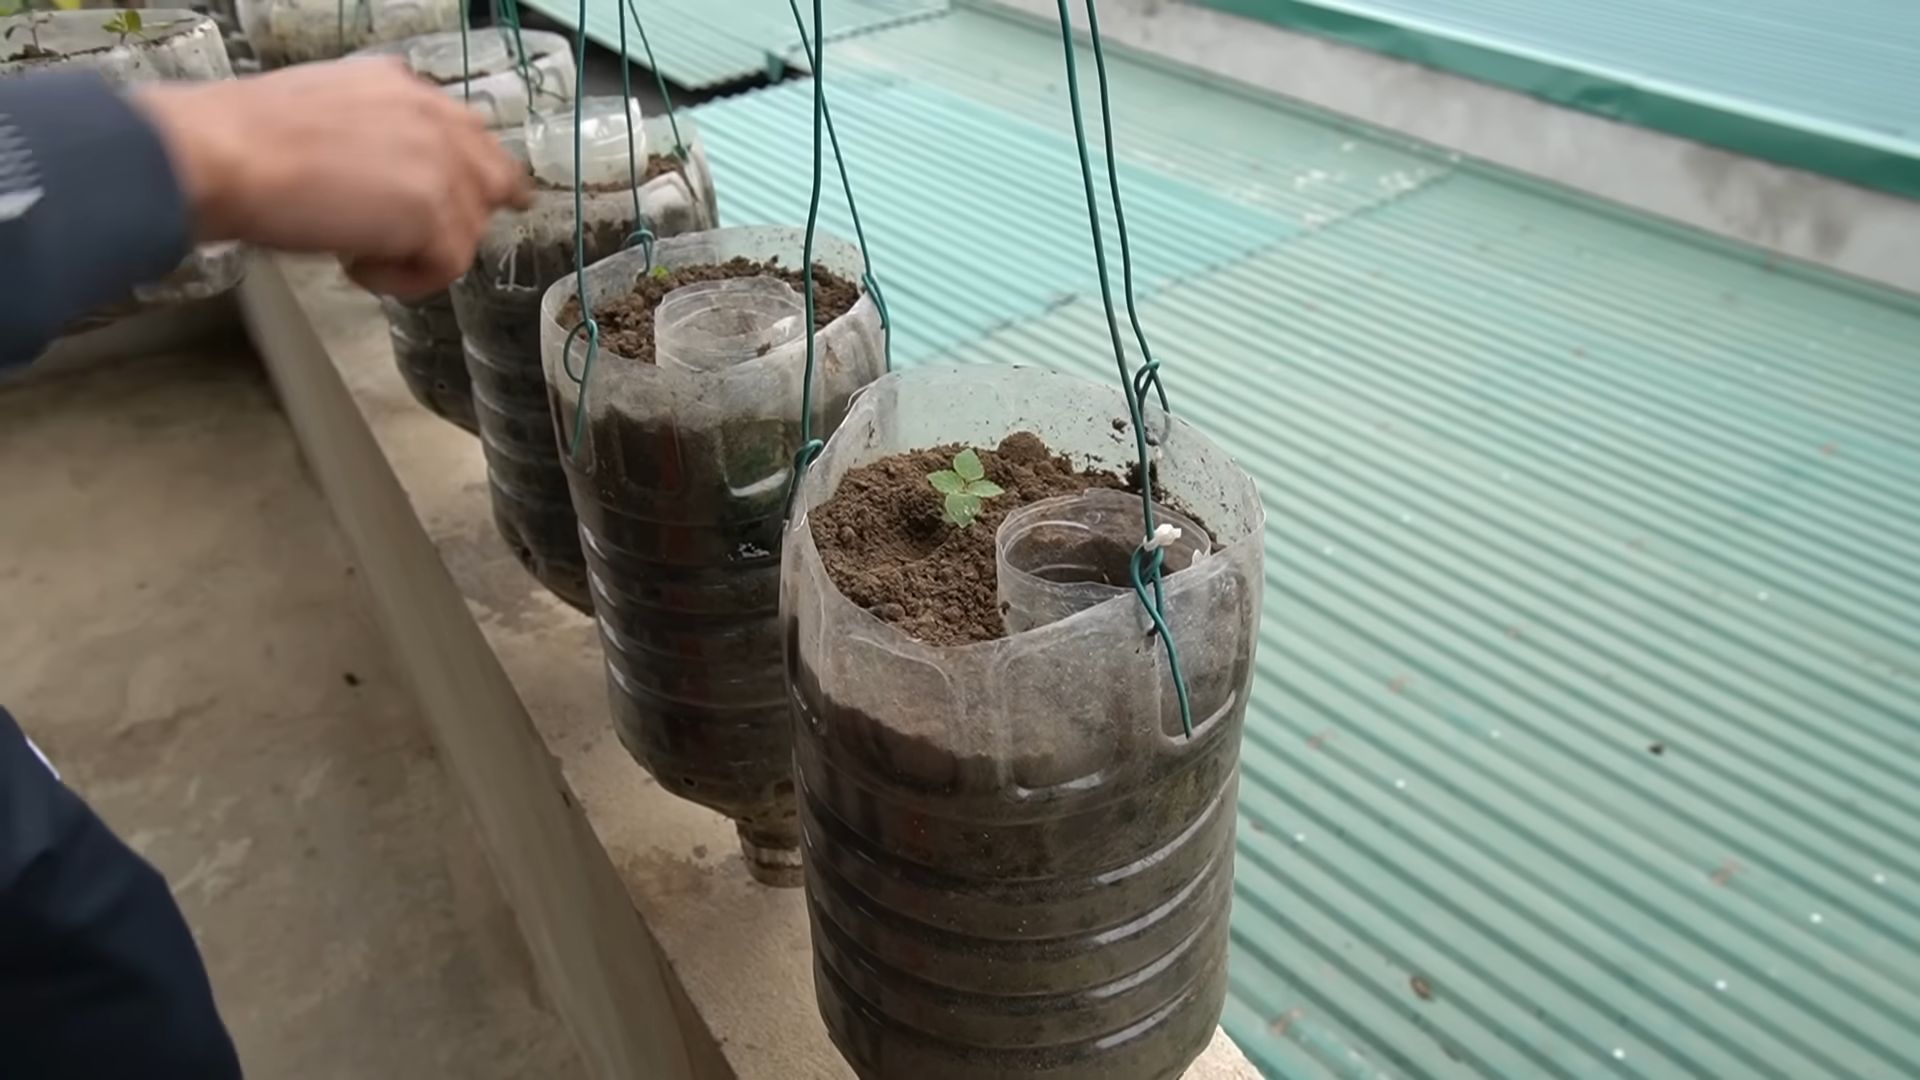
1. Cleaning: First, you need to thoroughly clean the plastic bottles. Remove all labels and rinse them with warm water and dish soap. Let them dry well before you continue. This is important so that no residues affect the soil or the plants.
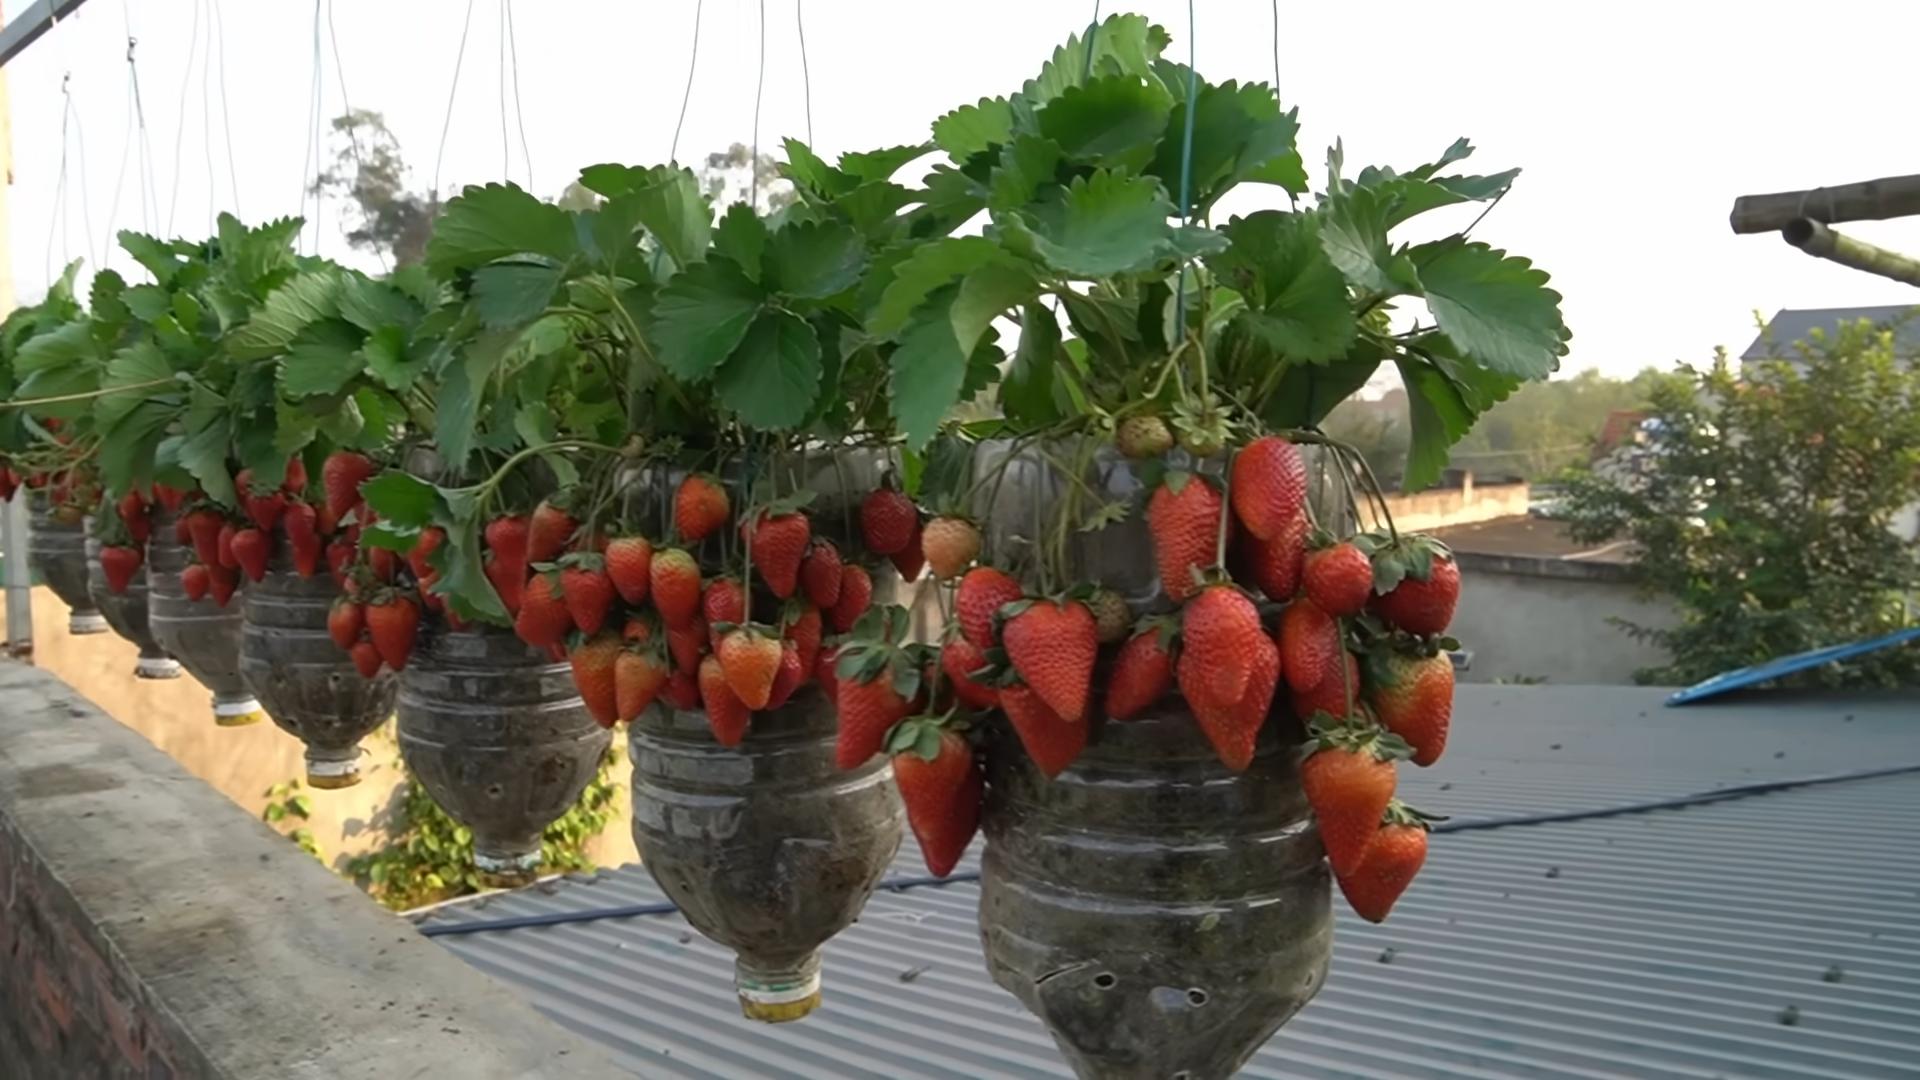
2. Drilling holes: Now we come to drilling the holes. Each bottle needs holes for the strawberry plants and for hanging.
- Planting holes: Cut or drill holes into the sides of the bottles. The size of the holes depends on the size of your strawberry plants. They should be large enough for the plants to fit in well, but not so large that the soil falls out. I recommend starting with smaller holes and enlarging them if necessary. You can make 2-4 holes per bottle, depending on how many plants you want per bottle. Make sure the holes are evenly distributed.
- Hanging holes: Drill or punch holes in the bottom and neck of the bottles with a nail and hammer. These holes are for the string or wire we will use to hang the bottles later. Make sure the holes are sturdy and won’t tear.
3. Optional: Decoration: If you wish, you can now paint the bottles with spray paint. This is, of course, not a must, but it makes the vertical garden visually more appealing. Make sure the paint is non-toxic and dries well before you plant the bottles. you can also use different colors to create a colorful garden.
Filling and Planting the Bottles
Now comes the fun part: filling and planting the bottles!
1. Fleece or Jute: If you want, you can line the holes in the bottles with fleece or jute. This prevents the soil from falling out and retains moisture better. Simply cut small pieces of fleece or jute and glue them over the holes with a little adhesive.
2. Filling with soil: Fill the bottles with soil. It’s best to use special strawberry or vegetable soil, as it contains the right nutrients for your strawberry plants. Be careful not to press the soil down too firmly, so the plant roots still get enough air.
3. Inserting the plants: Carefully place the strawberry plants into the holes. Make sure the roots are well covered with soil. Press the soil down lightly so the plants are stable.
4. Watering: Water the plants thoroughly after inserting them. This helps them get used to their new location.
Hanging the Vertical Garden
Now comes the final step: hanging our vertical strawberry garden!
1. String or Wire: Cut the string or wire into suitable pieces. The length of the pieces depends on how high you want to hang your garden and how much space you want between the bottles.
2. Connecting the bottles: Thread the string or wire through the holes in the bottom and neck of the bottles. Connect the bottles so they hang one above the other. Make sure the bottles hang securely and cannot fall.
3. Hanging: Find a suitable place to hang your vertical garden. This could be a balcony, a terrace, or a garden. Make sure the location is sunny, as strawberries need a lot of sun. Hang the garden on a sturdy hook or rod.
Caring for Your Strawberry Garden
For your strawberry plants to grow well and bear lots of fruit, proper care is important.
- Watering: Water your strawberry plants regularly, especially on hot days. Make sure the soil is always slightly moist, but not too wet. Avoid waterlogging, as this can lead to root rot.
- Fertilizing: Fertilize your strawberry plants regularly with a special strawberry fertilizer. This ensures a rich harvest.
- Pruning: Regularly remove dead leaves and runners. This promotes the growth of the plants and prevents diseases.
- Pest protection: Watch out for pests like slugs or aphids. Combat them with natural remedies if necessary.
- Harvesting: Harvest the strawberries as soon as they are ripe. They should be a beautiful red and soft. Pick them carefully so you don’t damage the plants.
Additional Tips and Tricks
- Different varieties: You can plant different strawberry varieties in your vertical garden. This gives you a wider range of flavors and harvest times.
- Herbs: You can also plant herbs like basil or mint between the strawberry plants. This not only looks good but also keeps pests away.
- Irrigation system: If you don’t have time to water your plants regularly, you can install an automatic irrigation system. This saves time and ensures your plants are always adequately supplied with water.
- Winterizing: In winter, you should protect your vertical garden from frost. Move it to a sheltered spot or cover it with fleece.
I hope you enjoyed this guide and have a lot of fun building your own vertical strawberry garden! Let me know if you have any questions or want to share your experiences. Good luck and a bountiful harvest
Conclusion
So, there you have it! Transforming ordinary plastic bottles into a thriving vertical strawberry garden is not just a fun project; it’s a game-changer for anyone looking to maximize space, minimize waste, and enjoy fresh, homegrown strawberries. This DIY trick offers a sustainable and incredibly rewarding way to cultivate your own delicious berries, even if you only have a small balcony or patio.
Why is this a must-try? Because it’s economical, eco-friendly, and efficient. You’re repurposing materials that would otherwise end up in a landfill, saving money on expensive planters, and creating an optimal environment for strawberry growth. The vertical design maximizes sunlight exposure and air circulation, leading to healthier plants and a more abundant harvest. Plus, let’s be honest, it looks fantastic! A wall of cascading strawberry plants is a beautiful and unique addition to any outdoor space.
But don’t stop there! Feel free to experiment with variations. Try using different sizes of plastic bottles to create a tiered effect. Add colorful paint or decorative elements to personalize your strawberry towers. Consider incorporating other herbs or flowers into the design for a visually stunning and fragrant display. You could even adapt this method for growing other small fruits and vegetables, like herbs, lettuce, or even cherry tomatoes. The possibilities are endless!
We’ve armed you with the knowledge and inspiration to embark on your own strawberry plastic bottle gardening adventure. Now it’s your turn to get creative and put your green thumb to the test. We are confident that you will find this project to be both enjoyable and fruitful.
Don’t be afraid to experiment, adapt, and personalize your strawberry garden to suit your specific needs and preferences. The most important thing is to have fun and enjoy the process of creating something beautiful and productive from something so simple.
We are incredibly excited to see what you create! Share your photos, tips, and experiences with us in the comments below. Let’s build a community of passionate gardeners who are committed to sustainable and innovative growing practices. Together, we can transform our spaces and our lives, one strawberry plant at a time. So, grab those plastic bottles, get your hands dirty, and start growing your own delicious strawberries today! You won’t regret it.
Frequently Asked Questions (FAQ)
What type of plastic bottles are best for strawberry plastic bottle gardening?
Ideally, you should use food-grade plastic bottles, such as those used for water, juice, or soda. Avoid using bottles that have contained harsh chemicals or cleaning products. PET (Polyethylene Terephthalate) bottles, often marked with a “1” inside a recycling symbol, are a common and generally safe choice. Make sure to thoroughly wash and rinse the bottles before using them to remove any residue.
How do I prepare the plastic bottles for planting?
First, thoroughly clean the bottles with soap and water. Then, cut holes in the sides of the bottles for planting the strawberry plants. The size and number of holes will depend on the size of the bottles and the size of the strawberry plants you are using. Make sure the holes are large enough to accommodate the roots of the plants but not so large that the soil will fall out. You’ll also need to create drainage holes in the bottom of each bottle to prevent waterlogging.
What type of soil should I use for my strawberry plastic bottle garden?
A well-draining potting mix is essential for healthy strawberry growth. A mix of equal parts potting soil, compost, and perlite or vermiculite is a good option. This combination provides the necessary nutrients, moisture retention, and drainage that strawberries need to thrive. Avoid using garden soil, as it can be too heavy and compact, hindering root growth.
How often should I water my strawberry plants in plastic bottles?
The frequency of watering will depend on the weather conditions and the type of soil you are using. Generally, you should water your strawberry plants when the top inch of soil feels dry to the touch. Water thoroughly until water drains out of the drainage holes at the bottom of the bottles. Avoid overwatering, as this can lead to root rot. During hot and dry weather, you may need to water your plants more frequently.
How much sunlight do strawberry plants need?
Strawberry plants need at least 6-8 hours of direct sunlight per day to produce a good crop of berries. Choose a location for your plastic bottle garden that receives plenty of sunlight throughout the day. If you live in a particularly hot climate, you may need to provide some afternoon shade to protect the plants from scorching.
What type of fertilizer should I use for my strawberry plants?
Strawberries are heavy feeders and benefit from regular fertilization. Use a balanced fertilizer specifically formulated for fruits and vegetables. Follow the instructions on the fertilizer packaging for application rates and frequency. You can also supplement with organic fertilizers, such as compost tea or fish emulsion.
How do I protect my strawberry plants from pests and diseases?
Regularly inspect your plants for signs of pests or diseases. Common strawberry pests include aphids, spider mites, and slugs. You can control these pests with insecticidal soap, neem oil, or by handpicking them off the plants. To prevent fungal diseases, ensure good air circulation around the plants and avoid overwatering.
Can I grow strawberries in plastic bottles indoors?
Yes, you can grow strawberries in plastic bottles indoors, but you will need to provide them with adequate light. Place the plants near a sunny window that receives at least 6-8 hours of direct sunlight per day. If you don’t have enough natural light, you can supplement with grow lights.
How long does it take for strawberry plants to produce fruit?
The time it takes for strawberry plants to produce fruit depends on the variety of strawberry and the growing conditions. Generally, you can expect to harvest your first strawberries within a few months of planting. Everbearing varieties will produce fruit throughout the growing season, while June-bearing varieties will produce a large crop of berries in the spring.
How do I overwinter my strawberry plants in plastic bottles?
In colder climates, you will need to protect your strawberry plants from freezing temperatures. You can move the plastic bottle garden indoors to a cool, bright location. Alternatively, you can wrap the bottles with burlap or blankets to insulate the roots. Water sparingly during the winter months, allowing the soil to dry out slightly between waterings.
Can I use this method for other plants besides strawberries?
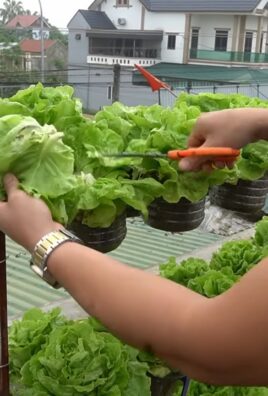
Absolutely! While this article focuses on strawberries, the plastic bottle gardening method can be adapted for a variety of other plants, especially herbs, leafy greens like lettuce and spinach, and even small vegetables like cherry tomatoes or peppers. The key is to choose plants with relatively shallow root systems and to adjust the size of the planting holes accordingly. Experiment and see what works best for you!
What if my plastic bottle garden tips over?
Stability is key! To prevent your plastic bottle garden from tipping over, ensure that the base is wide and stable. You can achieve this by using larger bottles for the bottom tier or by adding weight to the base with rocks or gravel. Also, make sure the bottles are securely connected to each other, using strong adhesive or zip ties if necessary.
How do I prevent algae growth in the plastic bottles?
Algae growth can be a common issue in plastic bottle gardens, especially if they are exposed to a lot of sunlight. To prevent algae growth, try painting the outside of the bottles with a dark color or wrapping them with opaque material. This will block sunlight from reaching the water and soil, inhibiting algae growth. You can also add a small amount of copper sulfate to the water, but be careful not to use too much, as it can be harmful to plants.
Leave a Comment