
Weird cleaning tips that work – sounds intriguing, right? I know, I know, you’re probably thinking, “Another cleaning article? Yawn!” But trust me, this isn’t your grandma’s guide to dusting. We’re diving deep into the quirky, the unconventional, and the downright bizarre cleaning hacks that actually deliver sparkling results. Forget harsh chemicals and hours of scrubbing; we’re talking about using everyday items in ways you never imagined!
Humans have been searching for cleaning shortcuts since, well, forever! From ancient Egyptians using natron (a naturally occurring salt mixture) to clean their homes to the Victorian era’s obsession with vinegar, the quest for a spotless space has always been a priority. But let’s face it, modern life is busy. Who has time to spend all day scrubbing? That’s where these weird cleaning tips that work come in.
I’ve personally tested these methods, and I’m here to tell you they’re not just some internet myth. They’re game-changers! Whether you’re battling stubborn stains, tackling grimy grout, or just looking for a faster, more eco-friendly way to keep your home fresh, these DIY tricks will save you time, money, and a whole lot of elbow grease. So, buckle up and get ready to discover the secrets to a cleaner, happier home – the weird way!
Weird Cleaning Tips That Actually Work (I Swear!)
Okay, let’s be honest. We’ve all been there. Staring at a stubborn stain, a grimy surface, or a lingering odor, and feeling utterly defeated. But before you reach for those harsh chemicals (or give up entirely!), I want to share some of my favorite weird cleaning tips that have saved me countless times. These aren’t your grandma’s cleaning secrets (well, maybe some are!), but they’re surprisingly effective and often use items you already have lying around. Get ready to be amazed!
Cleaning with Unexpected Pantry Staples
This section is all about raiding your kitchen for cleaning powerhouses you never knew existed.
Cleaning Chrome with Aluminum Foil
Yes, you read that right! Aluminum foil can work wonders on chrome fixtures.
Why it works: The slightly abrasive nature of the foil, combined with a bit of water, gently removes rust and grime without scratching the chrome.
What you’ll need:
* Aluminum foil
* Water
* Spray bottle (optional)
Instructions:
1. Tear off a sheet of aluminum foil: You’ll want a piece large enough to comfortably grip and scrub with. Crumple it into a ball.
2. Wet the chrome surface: You can either spray the chrome with water or dip the aluminum foil ball into water. The water acts as a lubricant and helps the foil glide smoothly.
3. Scrub gently: Using the crumpled aluminum foil, gently scrub the chrome surface in circular motions. You’ll see the rust and grime start to lift. Be careful not to apply too much pressure, especially on delicate chrome.
4. Rinse thoroughly: Once you’ve removed the rust and grime, rinse the chrome surface thoroughly with clean water.
5. Dry and buff: Use a clean, dry cloth to dry and buff the chrome to a sparkling shine.
Cleaning Your Microwave with Lemon
Microwaves can get notoriously gross, but this trick makes cleaning them a breeze.
Why it works: The steam from the lemon water loosens up splatters and grime, making them easy to wipe away. The lemon also deodorizes the microwave, leaving it smelling fresh.
What you’ll need:
* 1 lemon
* 1/2 cup water
* Microwave-safe bowl
Instructions:
1. Prepare the lemon water: Cut the lemon in half and squeeze the juice into a microwave-safe bowl. Add the lemon halves to the bowl as well. Pour in the water.
2. Microwave for 3 minutes: Place the bowl in the microwave and heat on high for 3 minutes. This will create steam that loosens the grime.
3. Let it sit for 5 minutes: Leave the microwave door closed for another 5 minutes to allow the steam to continue working.
4. Wipe clean: Carefully remove the bowl (it will be hot!). Use a sponge or cloth to easily wipe away the loosened grime.
5. Dry the interior: Use a clean, dry cloth to dry the interior of the microwave.
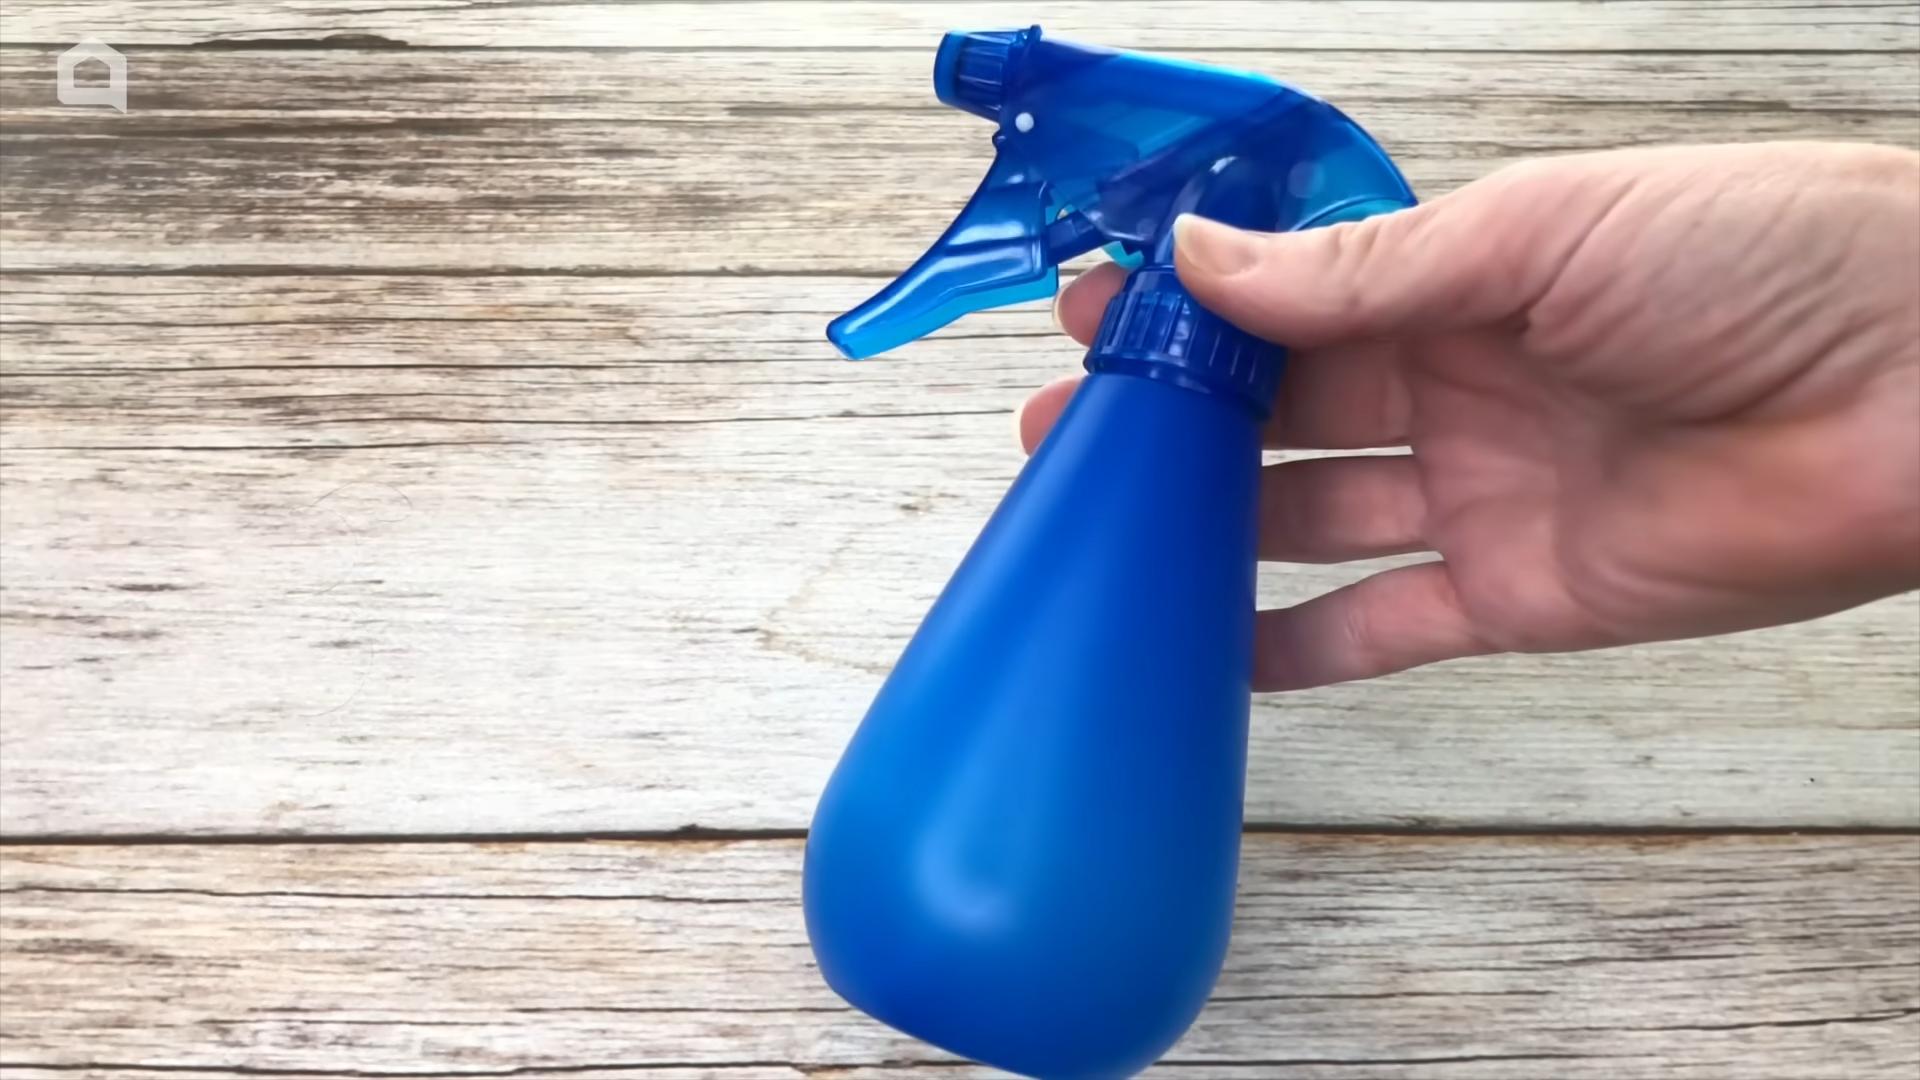
Cleaning Grout with Baking Soda and Vinegar
Grout can be a real pain to clean, but this dynamic duo works wonders.
Why it works: Baking soda is a mild abrasive that helps to scrub away dirt and grime. Vinegar is an acid that helps to dissolve mineral deposits and soap scum. The combination creates a fizzing action that helps to lift stains.
What you’ll need:
* Baking soda
* White vinegar
* Old toothbrush or grout brush
* Spray bottle
Instructions:
1. Apply baking soda: Sprinkle baking soda generously over the grout lines you want to clean.
2. Spray with vinegar: Pour white vinegar into a spray bottle and spray it directly onto the baking soda-covered grout lines.
3. Let it fizz: Allow the mixture to fizz for a few minutes. This helps to loosen the dirt and grime.
4. Scrub the grout: Use an old toothbrush or grout brush to scrub the grout lines thoroughly.
5. Rinse with water: Rinse the grout lines with clean water to remove the baking soda and vinegar residue.
6. Dry with a towel: Dry the grout lines with a clean towel.
Unconventional Uses for Everyday Items
This section explores how to repurpose common household items for cleaning tasks.
Cleaning Blinds with a Sock
Dusting blinds can be tedious, but this trick makes it much easier.
Why it works: The sock acts as a mitt, allowing you to easily grip and clean each slat of the blind. The microfiber material of the sock attracts dust and dirt.
What you’ll need:
* Old sock (preferably microfiber)
* Water or cleaning solution (optional)
Instructions:
1. Prepare the sock: Dampen the sock slightly with water or a cleaning solution (optional).
2. Place the sock on your hand: Put the sock on your hand like a mitt.
3. Clean the blinds: Use your sock-covered hand to wipe each slat of the blind, one at a time. Start at the top and work your way down.
4. Rinse or replace the sock: If the sock becomes too dirty, rinse it with water or replace it with a clean sock.
Removing Pet Hair with a Rubber Glove
Pet hair can be a nightmare, but a simple rubber glove can be a lifesaver.
Why it works: The rubber material of the glove creates static electricity, which attracts pet hair.
What you’ll need:
* Rubber glove (latex or nitrile)
* Water (optional)
Instructions:
1. Prepare the glove: Dampen the rubber glove slightly with water (optional). This can help to attract even more pet hair.
2. Wipe surfaces: Put on the glove and wipe your hand over surfaces covered in pet hair, such as furniture, carpets, and clothing.
3. Collect the hair: The pet hair will cling to the glove. Periodically remove the hair from the glove and discard it.
Cleaning a Showerhead with Vinegar and a Plastic Bag
Hard water can clog showerheads, reducing water pressure. This trick dissolves mineral deposits.
Why it works: Vinegar is an acid that dissolves mineral deposits, such as calcium and lime, that can clog showerheads.
What you’ll need:
* White vinegar
* Plastic bag (large enough to fit the showerhead)
* Rubber band or twist tie
Instructions:
1. Fill the bag with vinegar: Pour enough white vinegar into the plastic bag to completely submerge the showerhead.
2. Attach the bag to the showerhead: Carefully place the bag over the showerhead, ensuring that the showerhead is fully submerged in the vinegar. Secure the bag with a rubber band or twist tie.
3. Soak overnight: Let the showerhead soak in the vinegar overnight.
4. Remove the bag and rinse: Remove the bag and discard the vinegar. Rinse the showerhead thoroughly with water.
5. Remove any remaining debris: If there is any remaining debris, use a toothbrush or small brush to scrub it away.
Tackling Odors with Natural Solutions
This section focuses on using natural ingredients to eliminate unpleasant smells.
Deodorizing Your Fridge with Baking Soda
Baking soda is a classic odor absorber.
Why it works: Baking soda is an amphoteric substance, meaning it can react with both acids and bases. This allows it to neutralize a wide range of odors.
What you’ll need:
* Baking soda
* Small container or open box
Instructions:
1. Fill the container with baking soda: Pour baking soda into a small container or open box.
2. Place in the fridge: Place the container of baking soda in the back of your refrigerator.
3. Replace regularly: Replace the baking soda every month or two, or more often if you notice odors returning.
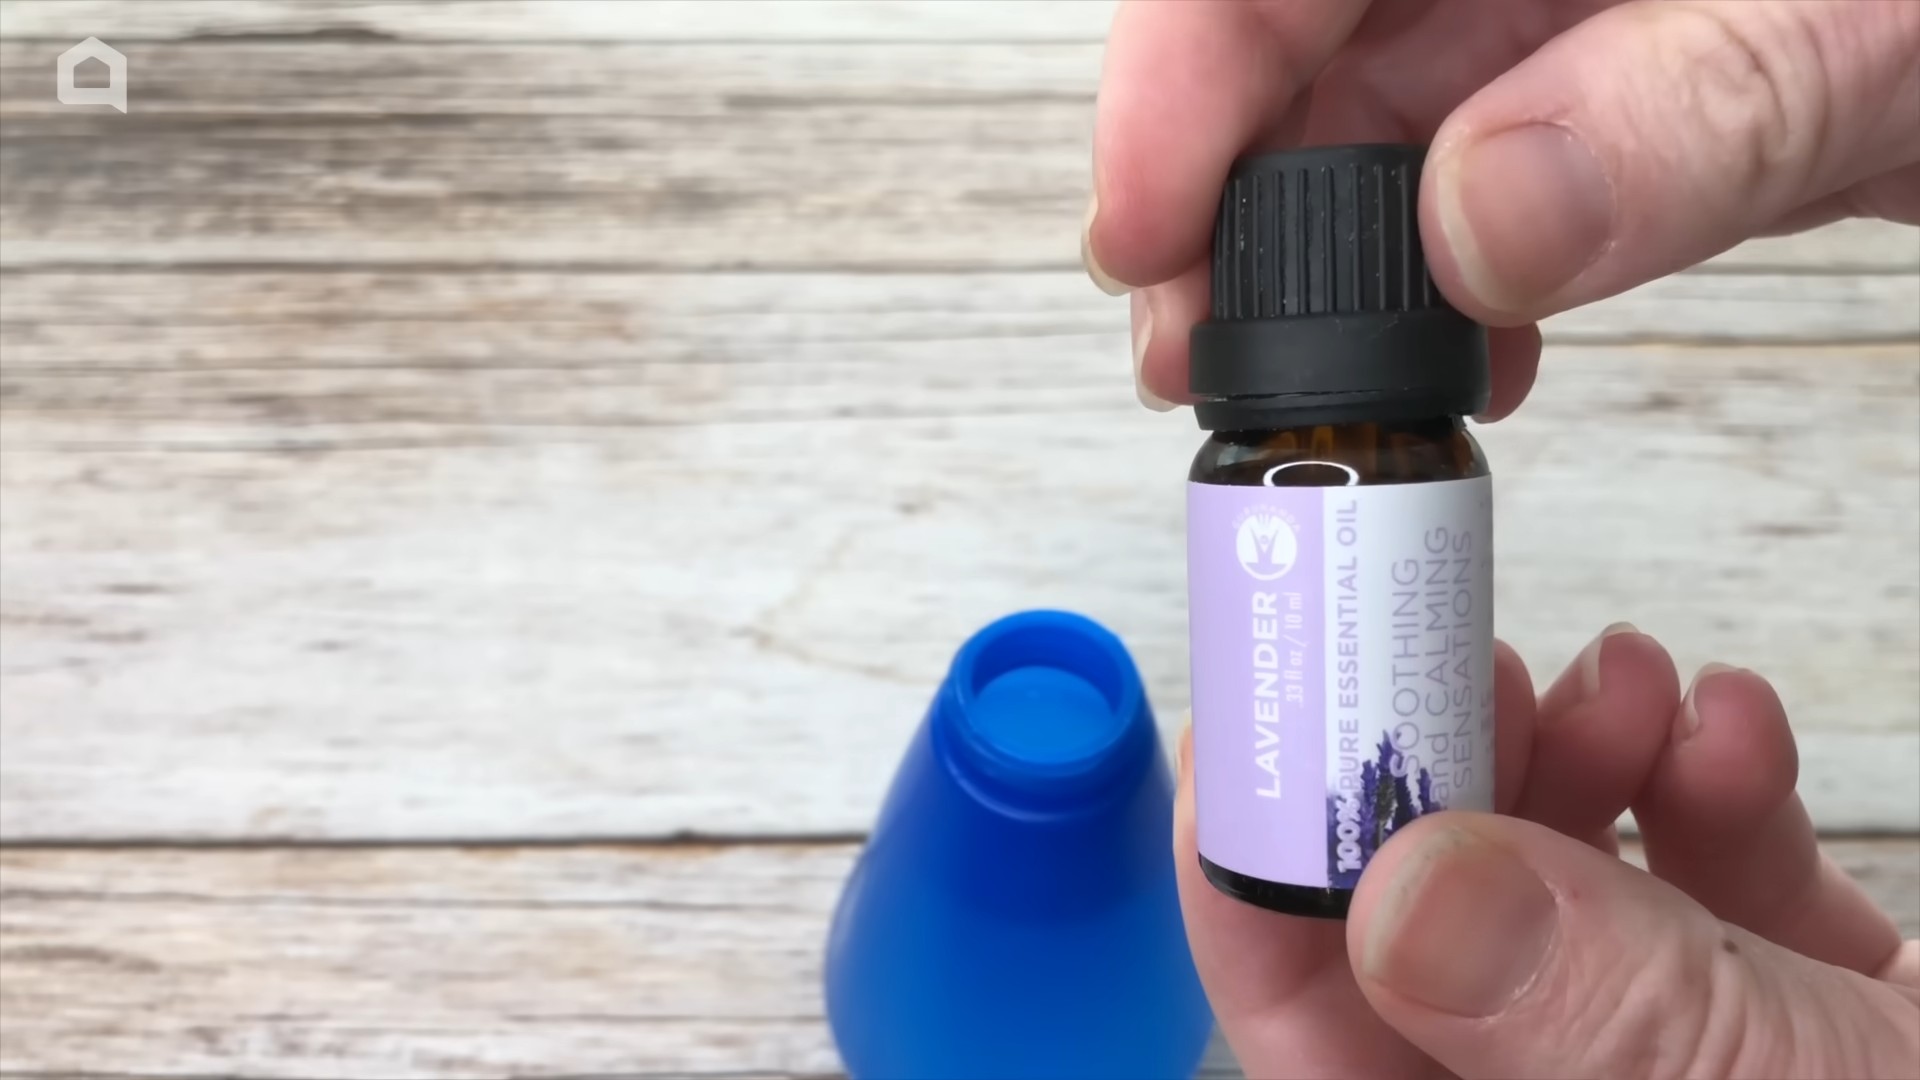
Freshening Carpets with Baking Soda and Essential Oils
This is a great way to freshen up carpets without harsh chemicals.
Why it works: Baking soda absorbs odors, while essential oils add a pleasant fragrance.
What you’ll need:
* Baking soda
* Essential oil (lavender, lemon, or tea tree are good choices)
* Shaker or jar with a perforated lid
* Vacuum cleaner
Instructions:
1. Mix baking soda and essential oil: In a shaker or jar, combine baking soda with a few drops of your favorite essential oil. Start with 5-10 drops per cup of baking soda and adjust to your preference.
2. Sprinkle on the carpet: Sprinkle the baking soda mixture evenly over the carpet.
3. Let it sit:
Conclusion
So, there you have it! These aren’t your run-of-the-mill cleaning tips; they’re the kind of “weird cleaning tips that work” that will leave you wondering why you haven’t tried them sooner. From banishing stubborn stains with unexpected pantry staples to revitalizing your home with simple, unconventional methods, these tricks are game-changers.
The beauty of these DIY cleaning solutions lies not only in their effectiveness but also in their simplicity and cost-effectiveness. You’re likely to have most, if not all, of the necessary ingredients already in your kitchen or bathroom. This means you can ditch those expensive, chemical-laden cleaners and embrace a more natural and budget-friendly approach to keeping your home sparkling.
But the real magic happens when you start experimenting and adapting these tips to your specific needs. For instance, if you’re dealing with particularly tough grime, try letting the baking soda paste sit for a longer period before scrubbing. Or, if you prefer a different scent, add a few drops of your favorite essential oil to the vinegar solution. The possibilities are endless!
Consider these variations:
* **Lemon Power:** For an extra boost of cleaning power and a fresh citrus scent, add lemon juice to your vinegar solution. This is especially effective for cleaning cutting boards and removing hard water stains.
* **Tea Time for Wood:** Brew a strong cup of black tea and use it to polish your wooden furniture. The tannins in the tea will help to restore the wood’s natural shine and hide scratches.
* **Salt Scrub for Cast Iron:** Instead of soap, use coarse salt to scrub your cast iron cookware. This will remove food particles without stripping the seasoning.
* **DIY Laundry Booster:** Add a half-cup of baking soda to your laundry to boost the cleaning power of your detergent and brighten your whites.
We understand that trying something new can be a little daunting, but we wholeheartedly encourage you to give these weird cleaning tips a try. You might be surprised at just how well they work! Not only will you save money and reduce your exposure to harsh chemicals, but you’ll also gain a sense of satisfaction from creating your own effective cleaning solutions.
Don’t just take our word for it, though. We want to hear about your experiences! Did you try one of these tips and find it particularly effective? Did you come up with your own unique variation? Share your stories, tips, and tricks in the comments below. Let’s create a community of DIY cleaning enthusiasts who are passionate about finding innovative and effective ways to keep our homes clean and healthy.
Remember, cleaning doesn’t have to be a chore. With a little creativity and a willingness to try something new, you can transform it into a fun and rewarding experience. So, go ahead, embrace the weird, and discover the power of these unconventional cleaning methods. You won’t regret it!
Frequently Asked Questions (FAQ)
Q: Are these “weird cleaning tips” safe for all surfaces?
A: While most of these tips are generally safe, it’s always a good idea to test them on a small, inconspicuous area first, especially on delicate or sensitive surfaces like natural stone, antique furniture, or painted walls. For example, vinegar, while a great cleaner, can etch certain types of stone. Always err on the side of caution and observe how the surface reacts before applying the solution to a larger area. If you are unsure, consult the manufacturer’s instructions for the specific surface you are cleaning.
Q: How often should I use these DIY cleaning solutions?
A: The frequency of use depends on the specific cleaning task and the level of dirt or grime. For general cleaning, you can use these solutions as often as you would use commercial cleaners. However, for more intensive cleaning tasks, such as removing stubborn stains or buildup, you may need to repeat the process several times. Pay attention to how your surfaces respond and adjust the frequency accordingly.
Q: Can I mix different DIY cleaning ingredients together?
A: It’s generally not recommended to mix different DIY cleaning ingredients together, especially without proper knowledge of their chemical properties. Some combinations can create harmful or even dangerous fumes. For example, never mix vinegar and bleach, as this produces chlorine gas, which is toxic. Stick to the recommended recipes and avoid experimenting with combinations unless you are certain they are safe.
Q: What if I don’t have all the ingredients listed in the recipes?
A: Many of these recipes are flexible and can be adapted based on what you have on hand. For example, if you don’t have white vinegar, you can often substitute it with apple cider vinegar. If you don’t have baking soda, you can try using washing soda instead. However, keep in mind that the effectiveness of the solution may vary depending on the substitutions you make.
Q: Are these “weird cleaning tips” environmentally friendly?
A: In most cases, yes! One of the biggest advantages of using DIY cleaning solutions is that they are often more environmentally friendly than commercial cleaners. They typically contain fewer harsh chemicals and are made with natural, biodegradable ingredients. This reduces your exposure to harmful toxins and minimizes your impact on the environment. However, it’s still important to dispose of cleaning solutions properly and avoid pouring them down the drain in large quantities.
Q: How do I store these DIY cleaning solutions?
A: Store your DIY cleaning solutions in clean, airtight containers, preferably made of glass or plastic. Label the containers clearly with the name of the solution and the date it was made. Keep them out of reach of children and pets. Store them in a cool, dark place to prevent them from degrading or losing their effectiveness. Some solutions, like those containing lemon juice, may need to be refrigerated to prevent spoilage.
Q: What are some other “weird cleaning tips that work” that I can try?
A: The world of unconventional cleaning is vast! Here are a few more ideas to get you started:
* **Use dryer sheets to remove static cling and freshen up drawers and closets.**
* **Clean your microwave by microwaving a bowl of water with lemon slices for a few minutes.**
* **Use a toothbrush to clean grout and other hard-to-reach areas.**
* **Remove pet hair from furniture with a damp rubber glove.**
* **Use toothpaste to polish silver and remove scratches from screens.**
The key is to be creative and experiment with different methods to find what works best for you.
Q: I tried one of these tips and it didn’t work as well as I expected. What should I do?
A: Don’t give up! Sometimes, it takes a little trial and error to find the right technique or concentration of ingredients. Consider the following:
* **Make sure you are using the correct ingredients and measurements.**
* **Adjust the amount of time you let the solution sit on the surface.**
* **Try scrubbing harder or using a different type of cleaning tool.**
* **Repeat the process several times if necessary.**
* **If the problem persists, try a different cleaning tip or consult a professional cleaner.**
Remember, every cleaning situation is unique, so what works for one person may not work for another.
Q: Can I use these tips to clean my car?
A: Some of these tips can be adapted for car cleaning, but be cautious. For example, a diluted vinegar solution can be used to clean windows and remove water spots. Baking soda can be used to deodorize the interior. However, avoid using harsh chemicals or abrasive cleaners on your car’s paint or upholstery. Always test any cleaning solution on a small, inconspicuous area first to ensure it doesn’t cause damage.
Leave a Comment